
TPLO Surgery Recovery in Dogs: Week-by-Week Rehab Timeline

When your dog has TPLO surgery for a CCL (ACL-equivalent) tear, the hardest part is often not the surgery itself. It is the weeks of careful, steady recovery afterward. As a veterinary assistant here in Frisco, Texas, I have seen how much a clear timeline can calm nerves and prevent setbacks.
This guide walks you through what many dogs experience week by week after TPLO (tibial plateau leveling osteotomy), including activity limits, physical therapy ideas, weight-bearing milestones, and red flags to watch for.
Quick note: This is general education, not a substitute for your veterinarian or surgeon’s instructions. Your surgeon’s plan always comes first, especially if your dog has other orthopedic issues, a meniscus injury, or a second knee at risk.
What TPLO recovery is really like
TPLO changes the biomechanics of the knee so it can be stable without the CCL. That stability comes from bone healing and the surgical implant, plus muscle rebuilding and controlled movement.
- Bone healing is an x-ray based decision. Many dogs show meaningful healing around 8 to 12 weeks, but radiographic consolidation varies by age, size, and individual factors.
- Function and fitness often continue improving through 12 to 16 weeks, and some dogs keep gaining strength for months.
- Complications are most often linked to too much activity too soon, infection, or meniscus problems. Other possible issues include seroma, implant-related problems (loosening or breakage), tibial tuberosity fracture, and late meniscal tears.
Think of recovery as a series of small wins. Your job is to protect the repair while your dog slowly returns to normal.
Before you start: Home setup and tools
Set up a safe recovery zone
- Use a crate or small room with non-slip flooring.
- Block stairs and furniture jumping. Baby gates are your best friend.
- Use rugs or yoga mats to prevent slipping.
- Keep water nearby and feed in the recovery area to reduce wandering.
- Separate pets during high-energy times. Even friendly play can cause a sudden twist.
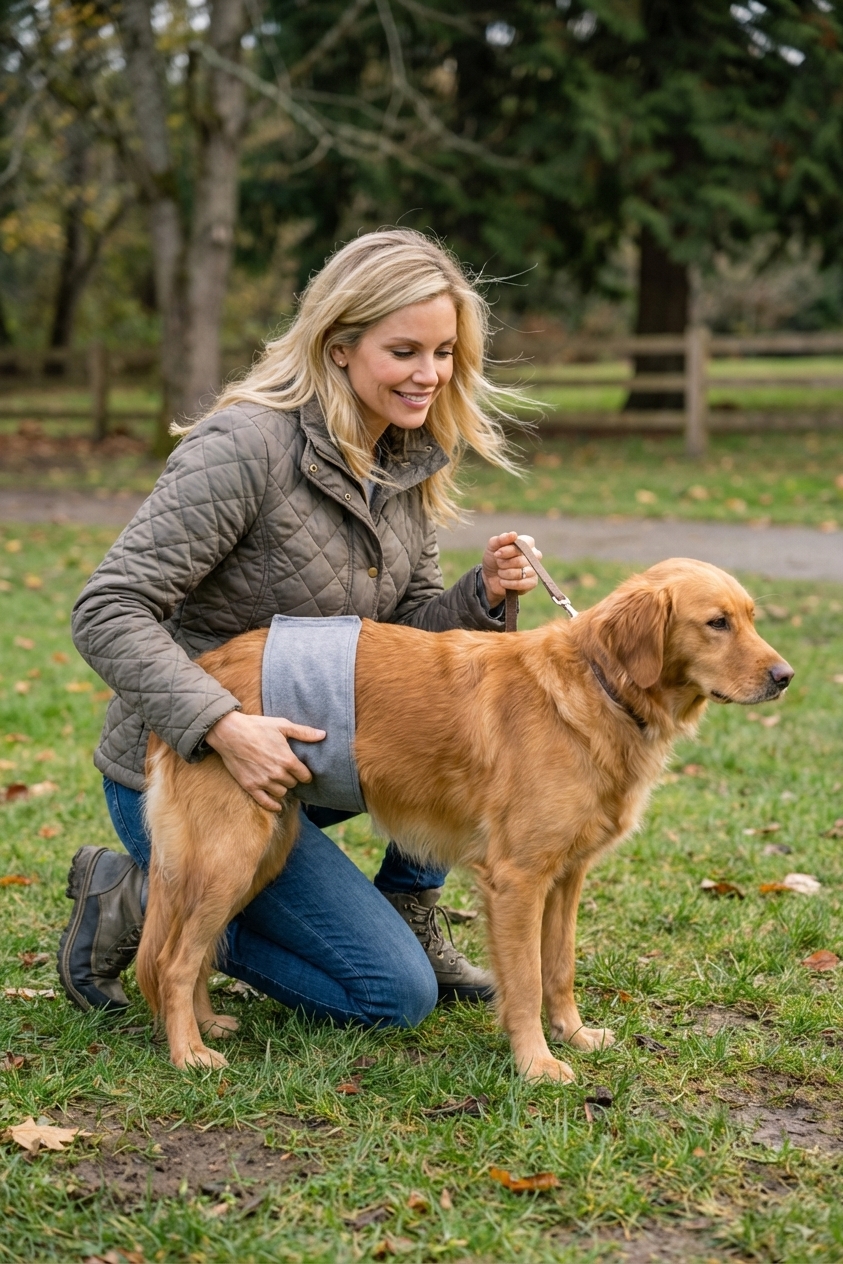
Stairs and car rules
- Stairs: Avoid if possible. If unavoidable, go one step at a time on a short leash and consider a sling early on.
- Car: Use a ramp or lift your dog in and out (if safe for you). Do not allow jumping in or out.
- Furniture: Block couch and bed access until you are cleared for it.
Helpful gear
- Sling or support towel for early potty trips
- Short leash (4 to 6 feet). Avoid retractable leashes.
- Harness for control and to reduce sudden lunges
- Elizabethan collar or recovery suit to prevent licking
- Cold packs and later a warm compress (per your vet’s timeline)
- Non-slip booties (optional) if your floors are slick
E-collar timing: Many dogs need it until sutures or staples are removed and the incision is fully closed. Your clinic will tell you when it is safe to stop.
Medication basics (high level)
Every surgeon has a preferred plan, but many dogs go home with a combination like:
- Pain control: often an NSAID (if appropriate), plus additional pain meds such as an opioid or gabapentin.
- Antibiotics: sometimes prescribed, sometimes not, depending on the case and surgeon.
- Stomach support: sometimes added if there is a history of GI sensitivity.
Call your vet if you see vomiting, diarrhea, black or tarry stool, refusal to eat, extreme sedation, agitation, facial swelling, hives, or any reaction that worries you. Never add human over-the-counter pain medication unless your veterinarian specifically instructs you to.
Week-by-week TPLO recovery timeline
Important: This is a common timeline for uncomplicated TPLO cases. Your surgeon may start walks earlier or later, and will adjust progression based on pain, swelling, gait, and x-rays. If limp or swelling worsens, you usually pause progression and call your clinic for guidance.
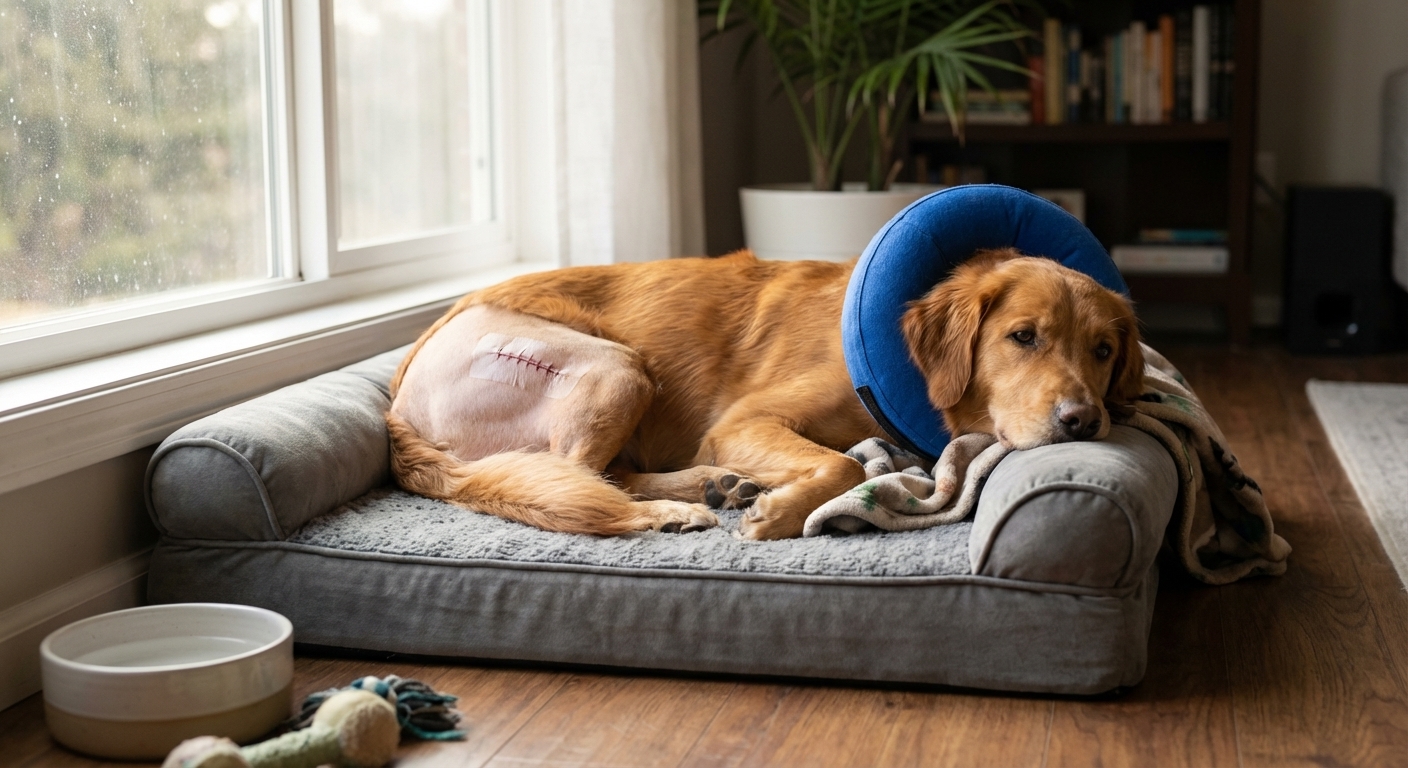
Week 0 (surgery day to day 3)
- Activity: Strict rest. Potty breaks only, on leash, for a few minutes.
- Weight bearing: Many dogs toe-touch or briefly place the foot. Some will not bear weight yet and that can be normal early on.
- Pain control: Give all meds exactly as prescribed.
- Incision care: Keep it clean and dry. No bathing. Prevent licking.
- Cold therapy: Often recommended for swelling in the first 48 to 72 hours. Use a barrier cloth and keep sessions short.
Gentle rehab ideas (only if instructed): supported standing for 10 to 20 seconds a few times a day, plus very gentle range of motion work demonstrated by your veterinary team. Some surgeons prefer to limit early motion in certain cases, so ask first.
Week 1 (days 4 to 7)
- Activity: Still strict rest. Leash potty breaks only.
- Weight bearing milestone: Many dogs begin placing the foot more consistently, but limping is expected.
- Rehab: Passive range of motion and soft tissue massage are commonly introduced when approved.
- Goal: Calm, consistent routines with zero slipping, jumping, or stairs.
Tip: If your dog is energetic, ask your vet about safe calming options. Mental enrichment like lick mats (supervised) and simple scent games in the crate can help.
Week 2 (days 8 to 14)
- Activity: Short, controlled leash potty trips. No running or rough play.
- Vet milestone: Many clinics remove staples or sutures around 10 to 14 days.
- Weight bearing milestone: A steady but still noticeable limp is common. Your dog should usually be using the leg at least part of the time.
- Rehab: Continue approved exercises. Some dogs are cleared to begin short, slow leash walks beyond potty breaks.
Transition note: Before you increase activity, you want swelling to be stable (or improving) and the limp to be gradually trending better, not worse.
Call your vet if your dog suddenly stops using the leg, seems more painful than the first week, or the incision looks worse instead of better.
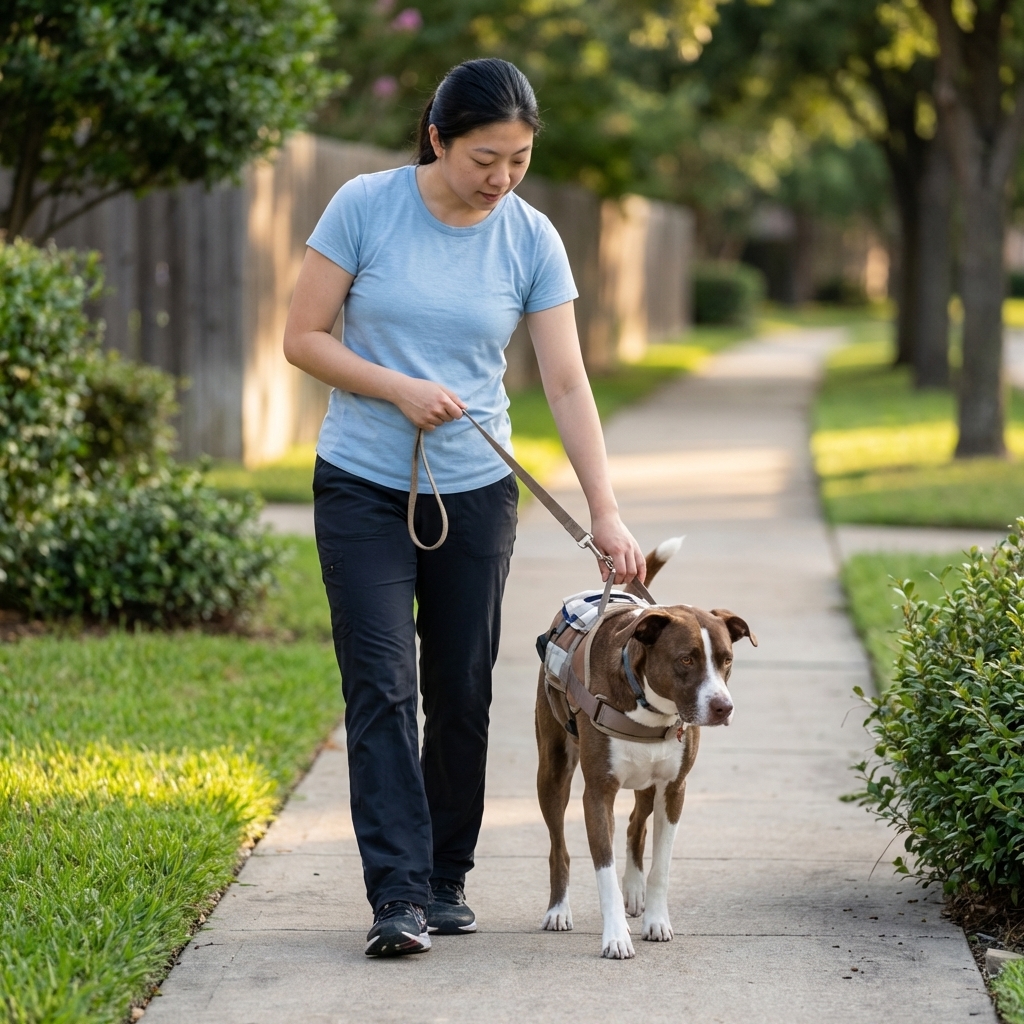
Weeks 3 to 4
- Activity: Many protocols begin structured leash walks during this window. A common starting point is around 5 minutes, 2 to 4 times daily, then increasing slowly as directed.
- Weight bearing milestone: Improved comfort and more consistent use of the limb.
- Rehab: Sit-to-stand practice, slow weight shifts, and controlled “cookie stretches” are often used. Hydrotherapy may be introduced by some surgeons.
- Still avoid: off-leash activity, jumping, stairs, and playing with other pets.
Weeks 5 to 6
- Activity: Leash walks usually increase gradually in duration, still slow and controlled.
- Weight bearing milestone: Many dogs look significantly better, but that does not mean the bone is fully healed yet.
- Rehab: Cavaletti poles (very low), figure-8 walking, and gentle incline walking may be added when approved.
- Goal: Build muscle without triggering inflammation.
Watch for: increased limping later in the day, stiffness after naps, or swelling around the knee. Mild ups and downs can happen, but worsening trends need a call to your vet.
Weeks 7 to 8
Many surgeons schedule a recheck and x-rays around this period, although some do them earlier (around 6 weeks) or later depending on the case. Clearance to advance is typically based on radiographic healing and a stable exam.
- Activity: If healing looks good, leash walks may lengthen and exercises can progress.
- Weight bearing milestone: Some dogs walk with only a mild limp or no obvious limp on flat ground.
- Still avoid: sudden sprints, jumping out of the car, chasing squirrels, wrestling with dog friends.
What “feels better” can trick you: dogs often feel good before the bone is ready. This is one of the most common times for setbacks.
Weeks 9 to 12
- Activity: Many dogs begin a slow return to longer walks and more normal household movement, based on x-rays and your surgeon’s plan.
- Rehab focus: endurance, hip and core strength, and rebuilding symmetrical gait.
- Milestone: Some dogs may start carefully limited off-leash time in a small, controlled area if approved, but many are not ready yet.
Pro tip: Keep a simple log. Note walk length, limp level, appetite, and energy. Patterns help you and your vet make smart adjustments.
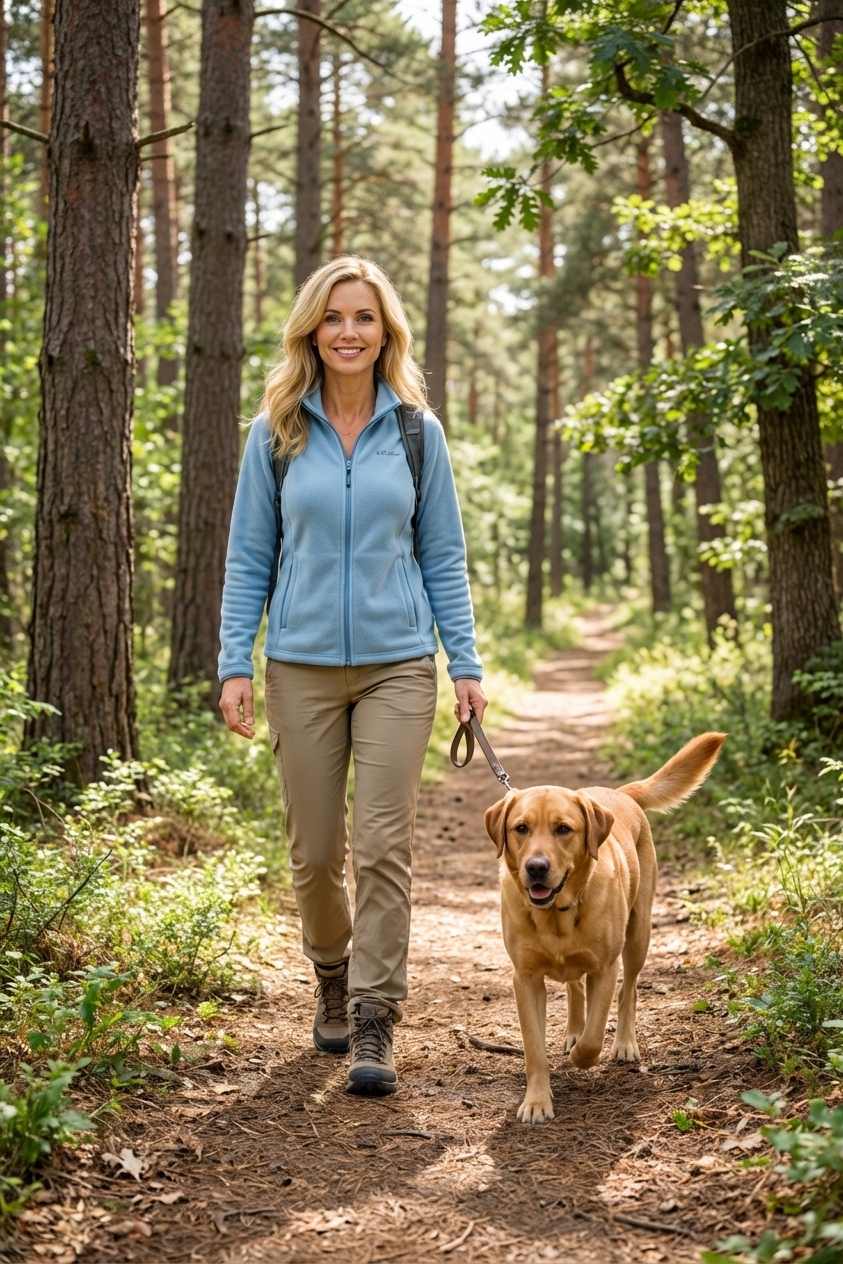
Weeks 13 to 16
By 3 to 4 months, many dogs are close to normal for daily life, and some can return to sports with a longer conditioning plan.
- Activity: Gradual reintroduction of running, hiking, and play, only if cleared.
- Milestone: Good muscle mass returning to the operated leg, stable knee, and comfortable full range of motion.
- Long-term goal: Prevent re-injury by maintaining lean body weight and ongoing strength work.
Incision healing: what to expect
Every dog bruises and swells a little differently, but many normal incisions follow this general pattern:
- Days 1 to 3: mild swelling, mild bruising, and a clean, closed incision.
- Days 4 to 7: bruising may look darker before it fades. The incision should stay dry and closed.
- Days 10 to 14: edges typically look sealed, with less redness. Staples or sutures are often removed.
Call your vet promptly for spreading redness, heat, discharge, bad odor, opening, or persistent licking.
Common rehab exercises
Physical therapy should be tailored to your dog and timed to healing. Ask your surgeon or rehab team what is appropriate for your stage.
- Passive range of motion: gentle flex and extend of the knee and hip to reduce stiffness.
- Massage: light muscle work to improve comfort and circulation.
- Weight shifting: slow side-to-side weight transfers while standing.
- Sit-to-stand: controlled reps to build quadriceps and glutes.
- Slow leash walking: the foundation of almost every TPLO protocol.
- Underwater treadmill: often helpful for building strength with less joint load.
Stop and call your rehab team if exercises cause sharp pain, repeated yelping, sudden worsening limp, or swelling that increases over 24 hours.
What is normal vs not normal
Often normal
- Mild to moderate limping that gradually improves
- Stiffness after resting, especially early on
- Muscle loss in the operated leg during the first weeks
- Small day-to-day fluctuations in gait
Call your vet promptly
- Incision concerns: spreading redness, heat, discharge, bad odor, opening, or intense licking
- Infection signs: fever, lethargy, poor appetite, worsening pain
- Sudden non-weight bearing after your dog had been using the leg
- Persistent or increasing swelling around the knee or hock
- New clicking or repeated painful yelps that suggest a possible meniscus issue
- New deformity or severe pain after a slip (concern for fracture or implant problems)
Emergency signs
- Severe bleeding
- Breathing difficulty
- Collapse, pale gums, or extreme weakness
- Uncontrolled vomiting after meds
Leash walking rules
- Use a harness for better control and less strain on the neck.
- Walk on flat, non-slip surfaces early on.
- Keep the pace slow to prevent sudden lunges or sprints.
- Avoid wet grass, icy sidewalks, and steep slopes until cleared.
- Potty breaks are not exercise. Structured walks are separate and intentional.
Nutrition and weight
If there is one evidence-based tip that helps almost every orthopedic patient, it is keeping them lean. Extra weight increases stress on the knee and can slow return to comfortable movement.
- Ask your vet for a target weight and daily calorie goal.
- Use measured meals, not free-feeding.
- Swap some treats for lean protein or dog-safe veggies if appropriate for your dog.
- Discuss supplements like omega-3s (EPA and DHA) with your vet, especially if your dog has arthritis changes.
Will the other knee tear too?
Many dogs with one CCL tear eventually injure the other knee. It is not guaranteed, but a substantial percentage do, and estimates are often quoted around 40 to 60% depending on the population and study.
- Keep your dog lean and strong.
- Follow rehab fully even when they seem “back to normal.”
- Ask your vet how to spot early signs like subtle limping after exercise or difficulty rising.
Quick checklist for rechecks
- Is my dog’s gait and muscle tone on track for this stage?
- When can we increase walk duration and how fast?
- Which exercises should we add next and which should we avoid?
- Do you recommend formal rehab or an underwater treadmill?
- When is the next x-ray, and what changes would delay activity increases?
- Is there anything about my dog’s implants or bone healing that changes our plan?
Slow rehab feels boring, but it is exactly what protects the surgery. Consistency is what brings your dog back to a happy, confident life.
Sources
- American College of Veterinary Surgeons (ACVS). Cranial Cruciate Ligament Rupture. https://www.acvs.org/small-animal/cranial-cruciate-ligament-rupture/
- AAHA. Pain Management Guidelines for Dogs and Cats (2022). https://www.aaha.org/aaha-guidelines/pain-management/
- Postoperative TPLO and veterinary rehabilitation protocols as commonly published and used by board-certified surgeons and certified canine rehabilitation practitioners (protocols vary by patient and surgeon, and x-ray timing may differ).