Start homemade dog food safely with this vet-informed starter plan. Learn what “vet approved” means, choose a balancer, follow a 14-day transition, and u...
Article
•
Designer Mixes
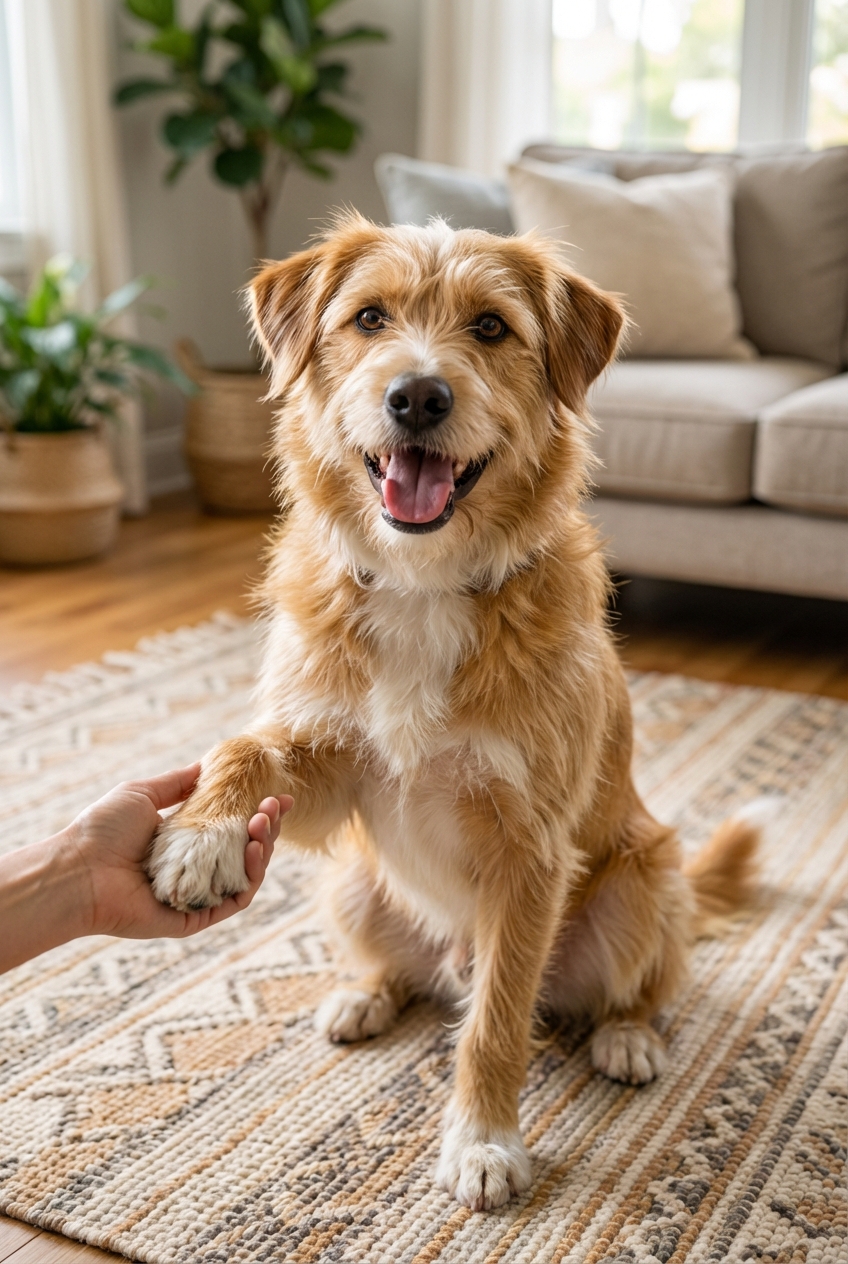
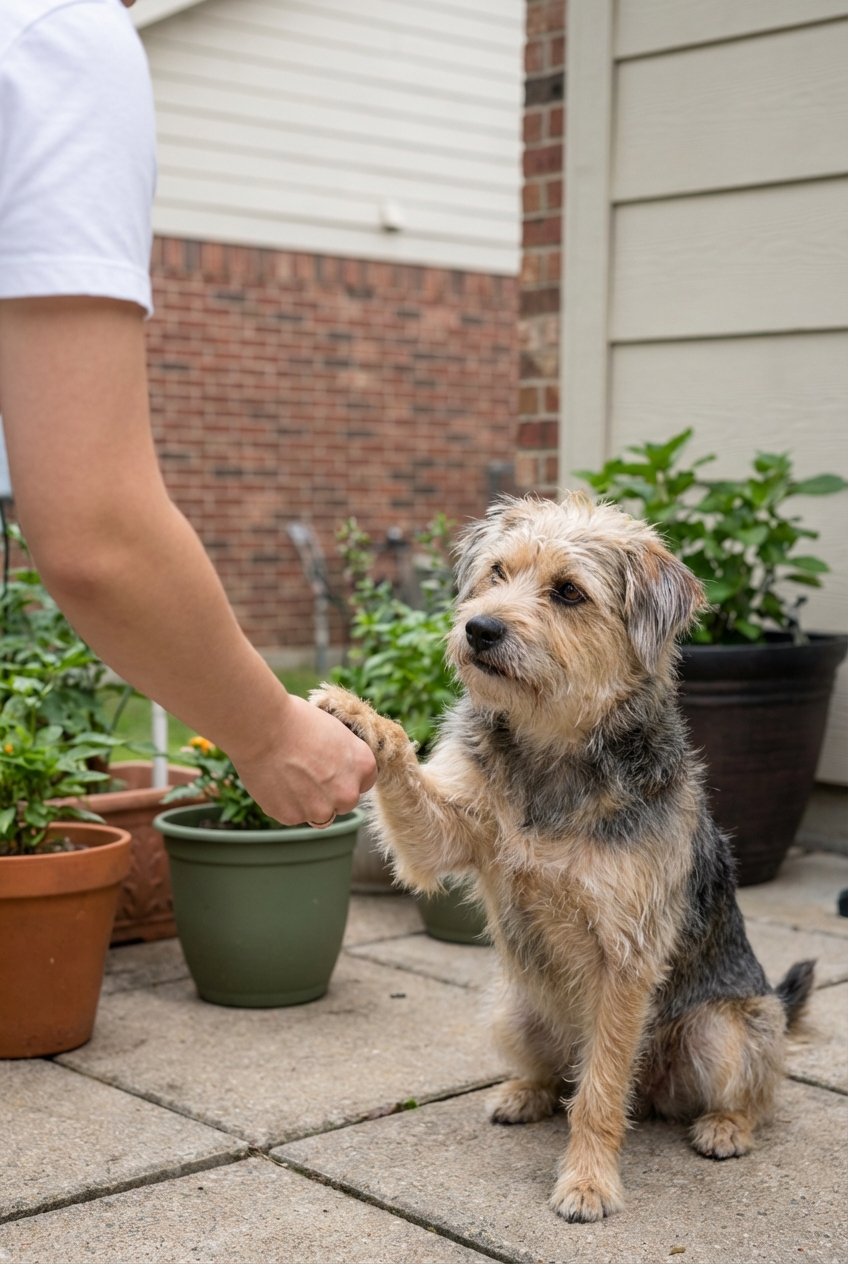
Teach a Dog to Shake

Shari Shidate
Designer Mixes contributor
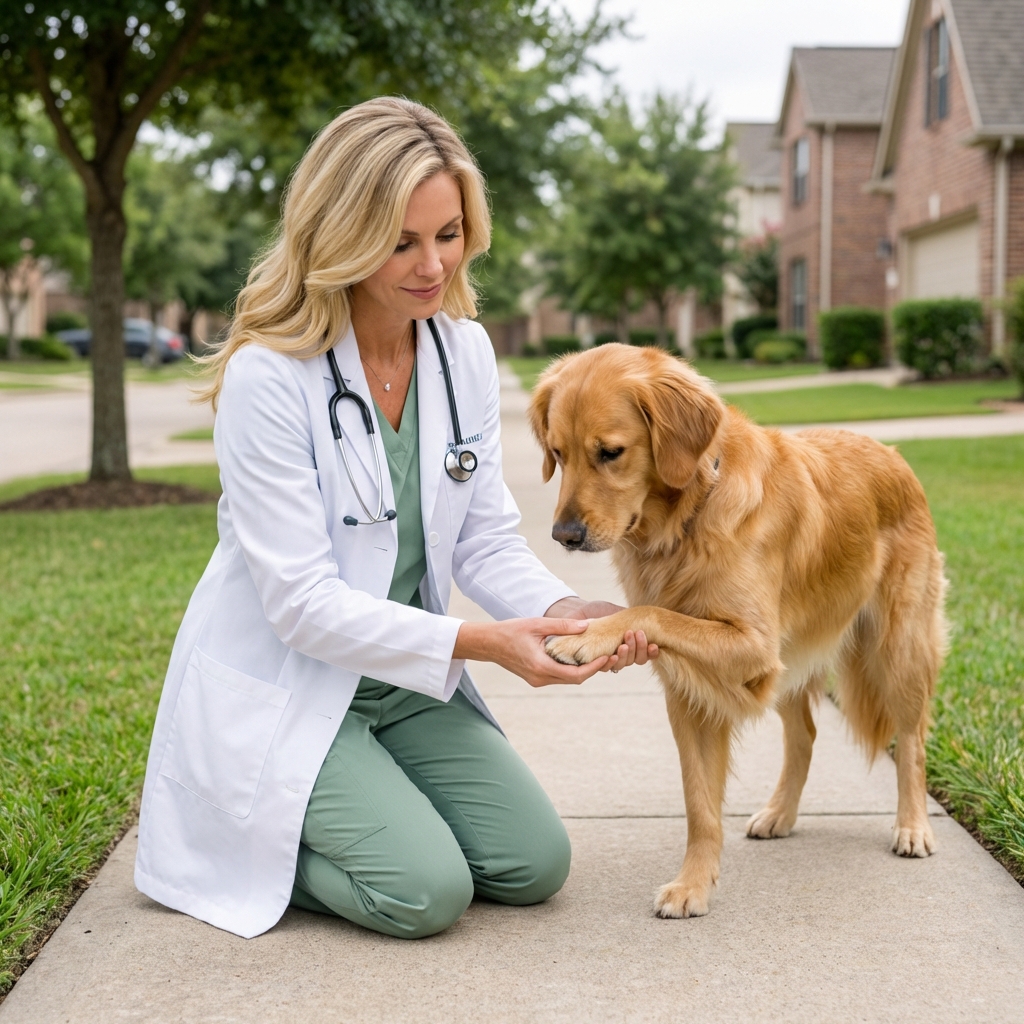
Teaching your dog to shake is one of those small skills that can create a big ripple of good behavior. It can build polite greetings, strengthen your bond, and give your dog a simple “job” that may help take the edge off nervous energy for some dogs. As a veterinary assistant here in Frisco, Texas, I also love shake because it can help many dogs feel more comfortable with gentle paw handling, which matters for nail trims, paw checks, and vet visits.
The key is to keep it positive, short, and clear. You are not “forcing a paw.” You are teaching a voluntary behavior your dog chooses because it pays off.
What shake teaches
Shake is more than a party trick. It can support:
- Impulse control: your dog learns to sit still while offering a paw.
- Confidence: earning rewards through training is empowering.
- Handling tolerance: gradual paw contact can make grooming and exams easier.
- Polite greetings: you can replace jumping with “sit” and “shake.”
For many dogs, this is a great early cooperative care skill, meaning your dog participates instead of being restrained. That is kinder and can be safer when trained thoughtfully and paired with good handling, although some dogs may still need veterinary support for stressful care.
Before you start
Supplies
- Treats: soft, pea-sized, high value (chicken, cheese, or a favorite training treat).
- Marker: a clicker or a consistent word like “Yes.”
- Quiet space: low-distraction for the first few sessions.
Timing
Plan for 2 to 5 minutes per session. Two short sessions a day beats one long session, especially for puppies.
Quick paw check
If your dog is limping, licking a paw constantly, or yelps when you touch their feet, pause training and check for debris, torn nails, or soreness. If pain is possible, talk with your veterinarian before practicing paw behaviors.
When not to train shake
- Recent injury or surgery: especially anything involving paws, wrists, elbows, shoulders, or back.
- Arthritis flare-ups: paw lifting can be uncomfortable on sore days.
- Broken nails or raw pads: wait until healed.
- Demand-pawing spirals: if shake is turning into constant pawing for attention, pause and add more structure (see the fix below).
Teach shake step by step
There are a few good ways to teach shake. This approach is simple for most families.
Step 1: Start with “sit”
Ask for “sit”, then mark and reward. A steady sit makes it easier for your dog to balance and offer a paw.
Step 2: Get a paw lift
Hold a treat in a closed fist at your dog’s nose level. Many dogs will sniff, then paw at your hand. The moment the paw lifts or touches your fist, mark and reward.
If your dog just nose-bumps or freezes, try one of these:
- Be boring for a beat: keep your fist still and wait quietly for any paw movement, then mark it.
- Move your fist slightly: slowly slide it a couple inches away. Some dogs paw when the “prize” drifts.
- Capture a lift: if your dog naturally lifts a paw while shifting weight, mark that tiny lift and reward.
Step 3: Switch to an empty hand
This is the transition many people miss. Your “shake hand” should now be empty.
- Show your hand like a handshake, palm open and steady. Keep fingers together or slightly curled so there is less chance of accidental nipping.
- Keep the treat in your other hand or in a pocket.
- When your dog places their paw in your open palm, mark, then deliver the treat from the other hand.
This fades the food lure while keeping the behavior clear. The open palm becomes the signal, and the reward still shows up right after.
Step 4: Add the cue word
When the behavior is predictable, say “Shake” right before you present your open hand. Mark and reward after the paw touches your palm.
Step 5: Build a short hold
At first, reward a quick tap. Over time, wait half a second longer before marking so your dog learns to rest their paw briefly in your hand. Keep it easy and upbeat.
Step 6: Teach the other paw
If you want “left” and “right,” teach one side first until it is strong. Then switch hands and repeat the process. Many dogs need time to understand the other paw also works.
Optional method: Capture a natural shake
Some dogs never paw at a fist, and that is okay. You can teach shake by capturing what they already do:
- Ask for “sit.”
- Watch for any paw lift (even a tiny one) and mark it.
- After a few reps, present your open palm just under that lifting paw. Mark when it lands in your hand.
- Then add the cue “Shake.”
Common problems
Your dog grabs or mouths your hand
- Use a flat, steady palm, fingers together or slightly curled.
- Reward with the other hand so your shake hand stays neutral.
- If your dog gets mouthy, pause and practice a calmer hand target (“touch” to your palm) before returning to shake.
Your dog paws repeatedly
This usually means your dog learned that frantic pawing makes treats happen. Add structure:
- Only reward one paw contact per cue.
- After rewarding, reset with a release cue like “all done” or “free” and a brief pause.
- Reward calm stillness between reps (a quiet sit, relaxed body, or soft attention).
Your dog will not offer a paw
- Try a slightly higher value treat.
- Train when your dog is not overly tired or overexcited.
- Break it down further: mark and reward any paw lift, even a tiny one.
- Try the optional capture method above.
Your dog seems uncomfortable with paw handling
Go slower and make it a consent-based game:
- Reward for letting you briefly touch the leg, then the paw, then the toes over multiple sessions.
- Keep contact light and short.
- Stop if you see stress signals like pulling away, lip licking, pinned ears, or whale eye.
In clinic, we see the best results when families practice tiny, calm handling moments at home, not when a paw is already sore or everyone is rushed.
Paw care and safety
Because shake involves paw contact, a little paw care goes a long way.
- Nail length matters: if you hear nails clicking on hard floors, it can be a sign they are getting long, depending on nail shape, gait, and flooring. If you are unsure, ask your groomer or vet team to show you a good length.
- Check pads: look for cracks, foxtails, small cuts, or salt irritation after walks.
- Pick stable surfaces: start on carpet or a yoga mat so your dog does not slip.
- Avoid forced holds: do not squeeze the paw or hold it too long. Let your dog opt in.
Use shake in real life
Once your dog understands “shake,” you can turn it into a great manners skill.
- Greeting routine: ask for “sit,” then “shake” instead of letting guests trigger jumping.
- Vet visit practice: do a calm shake at home, then reward, so paw touch feels normal.
- Grooming prep: pair shake training with brief, gentle paw touches and treats.
Tip: If your dog is excited around visitors, practice shake when the house is quiet first. Skills built in calm moments hold up better under distraction.
FAQ
How long does it take?
Some dogs learn the basics in a few short sessions. For others it takes longer, especially with puppies, timid dogs, or busy households. As a general guideline, you might see a reliable shake in a low-distraction setting in about a week, then spend a few more weeks practicing around guests and excitement. Consistency matters more than speed.
Is shake safe for puppies?
Yes, when done gently and voluntarily. Keep sessions short, use soft treats, and avoid pulling the paw. If your puppy is wiggly, focus on calm “sit” first.
My dog has arthritis. Should we avoid shake?
Possibly. Some dogs with joint pain find paw lifting uncomfortable. Talk with your veterinarian, and consider alternatives like nose target, chin rest, or “touch” to your hand.
Simple training plan
If you like checklists, here is a friendly schedule:
- Days 1 to 2: “Sit” plus paw lift toward your closed fist (reward any lift).
- Days 3 to 4: Paw in your empty open palm (reward quick taps, treat from the other hand).
- Days 5 to 7: Add the cue “Shake” and practice in two rooms.
- Week 2: Add mild distractions like a family member walking by, then practice with a second person.
Quick proofing tips
- Practice with your dog sitting on different surfaces (carpet, mat, grass).
- Practice with your hand slightly higher or lower, so your dog learns the cue, not one exact picture.
- Let a calm family member ask for “Shake,” then reward. This helps your dog generalize.
- Use a clear release cue like “all done” so your dog knows when the game is over.
Keep it upbeat, keep it kind, and celebrate the small wins. Training is health care too because it can reduce stress and build communication.