Step-by-step tick removal for cats using tweezers or a tick tool, plus what not to do, how to clean the bite, when to call the vet, and prevention advice.
Article
•
Designer Mixes
Removing a Tick From a Cat

Shari Shidate
Designer Mixes contributor
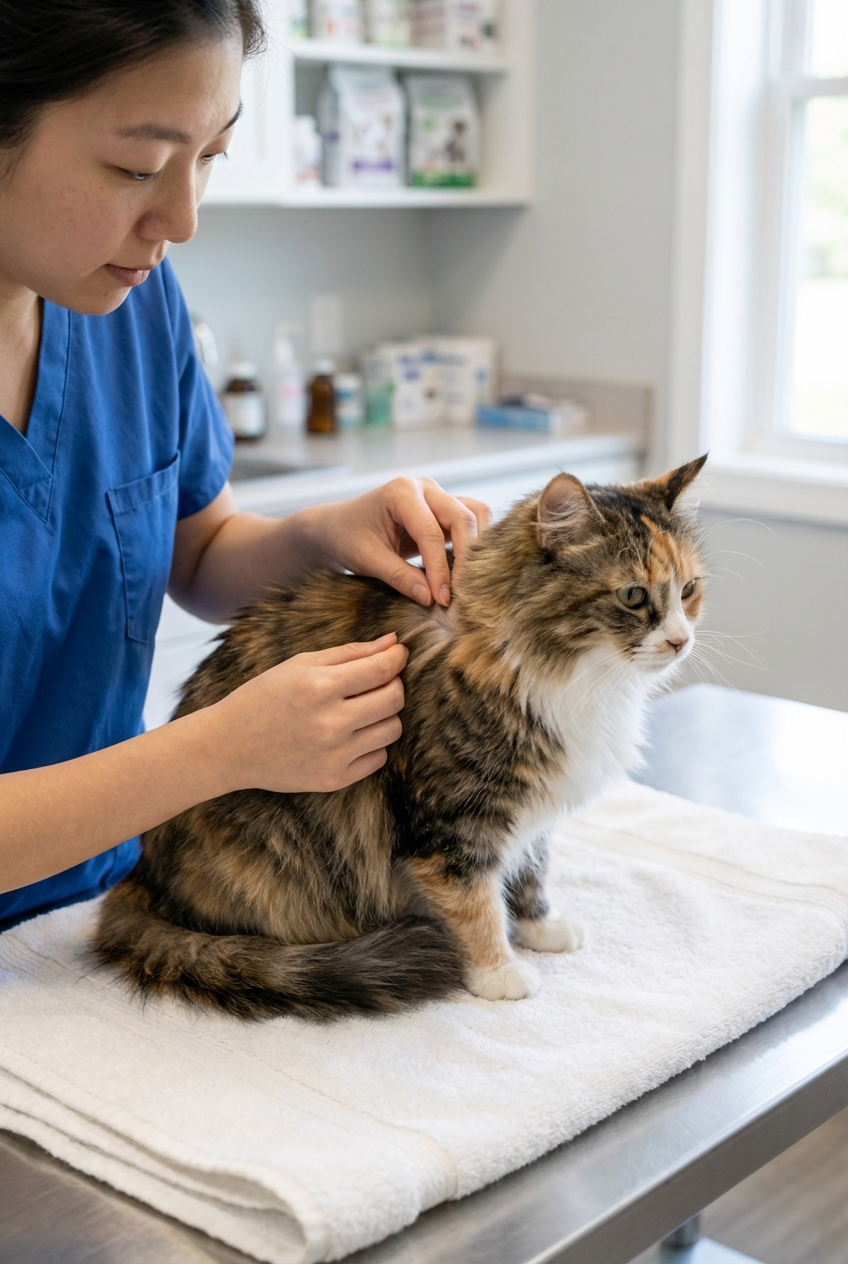
Finding a tick on your cat can make your stomach drop. I get it. The good news is that many ticks can be removed safely at home if your cat seems comfortable, you have the right tools, and you feel confident doing it. The key is staying calm, moving slowly, and protecting both you and your cat.
Quick note: if your cat is a kitten, immunocompromised, painful, acting ill, very wiggly, or the tick is in a hard spot (like inside the ear canal, near the eye, or on the gums), it is absolutely okay to call your vet and let them handle it.

Why ticks matter for cats
Ticks are not just gross. They can transmit infections, cause local skin irritation, and in rare cases create more serious illness. Even if your cat is mostly indoors, ticks can hitch a ride inside on dogs, people, or clothing, especially during warm months.
The earlier you remove a tick, the better. Transmission risk generally increases the longer a tick is attached, but timing varies by tick species and what it may be carrying. Same-day removal is still a win.
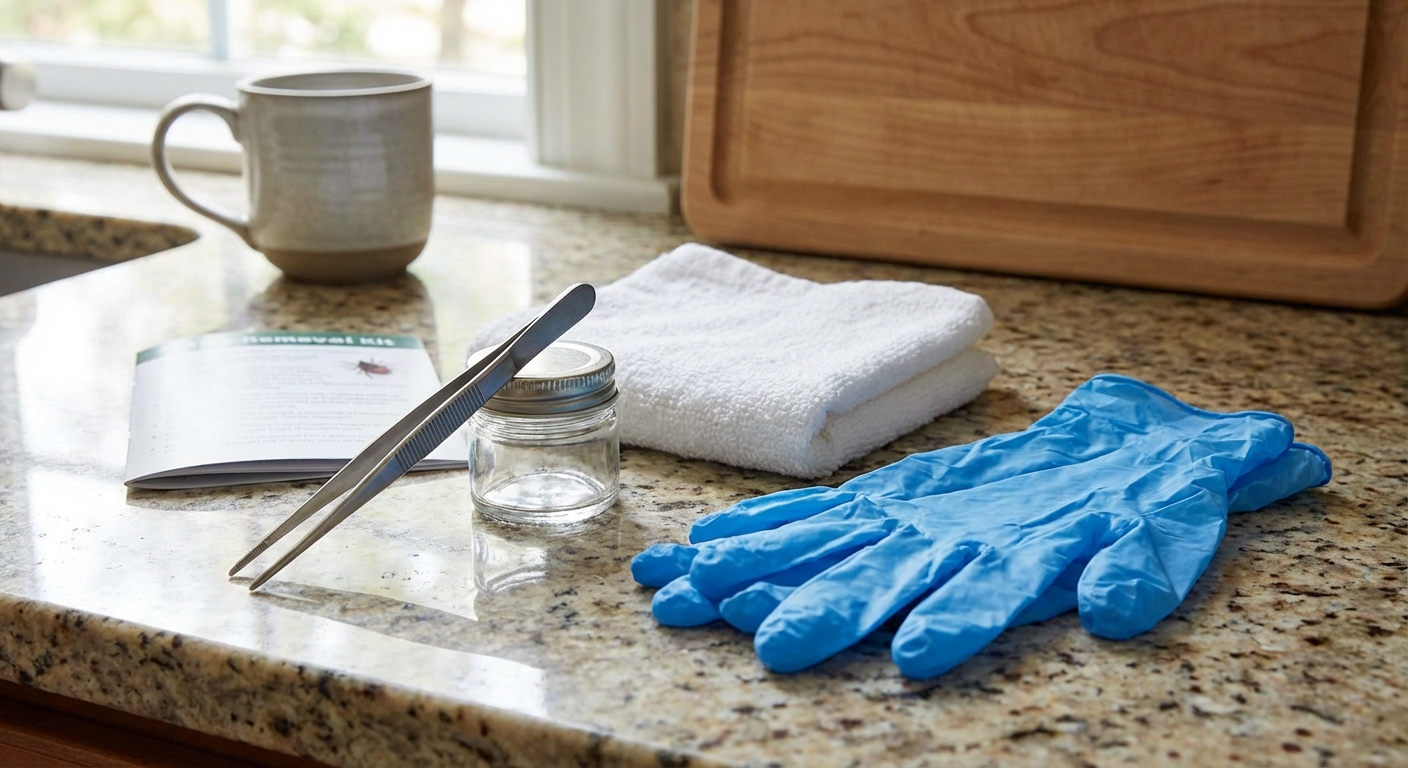
What you need before you start
Set yourself up for success. This takes just a minute and can prevent a wrestling match.
- Fine-tipped tweezers or a tick removal tool
- Disposable gloves
- Rubbing alcohol (for cleaning tools and safe disposal, and sometimes for saving the tick)
- Small container or zip bag (to save the tick if needed)
- Good light and possibly a flashlight
- Treats and a towel or blanket for gentle restraint
- Pet-safe antiseptic only if your vet has okayed it for your cat (for example, diluted chlorhexidine around 0.05%, not full-strength)
How to remove a tick safely
Step 1: Pick a calm moment
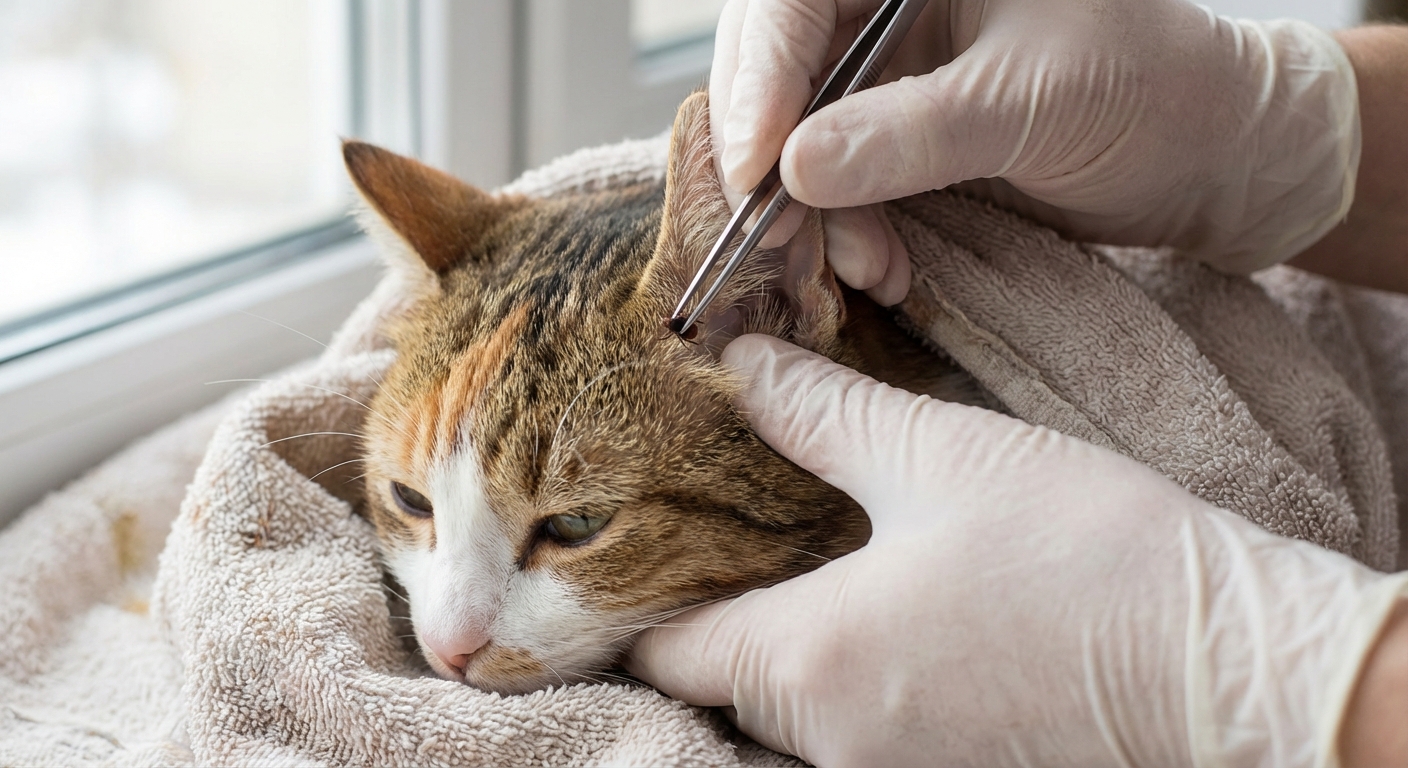
Choose a quiet room. Close the door. If your cat is nervous, wrap them in a towel like a gentle burrito, leaving just the tick area exposed. This is safer for you and less stressful for your cat.
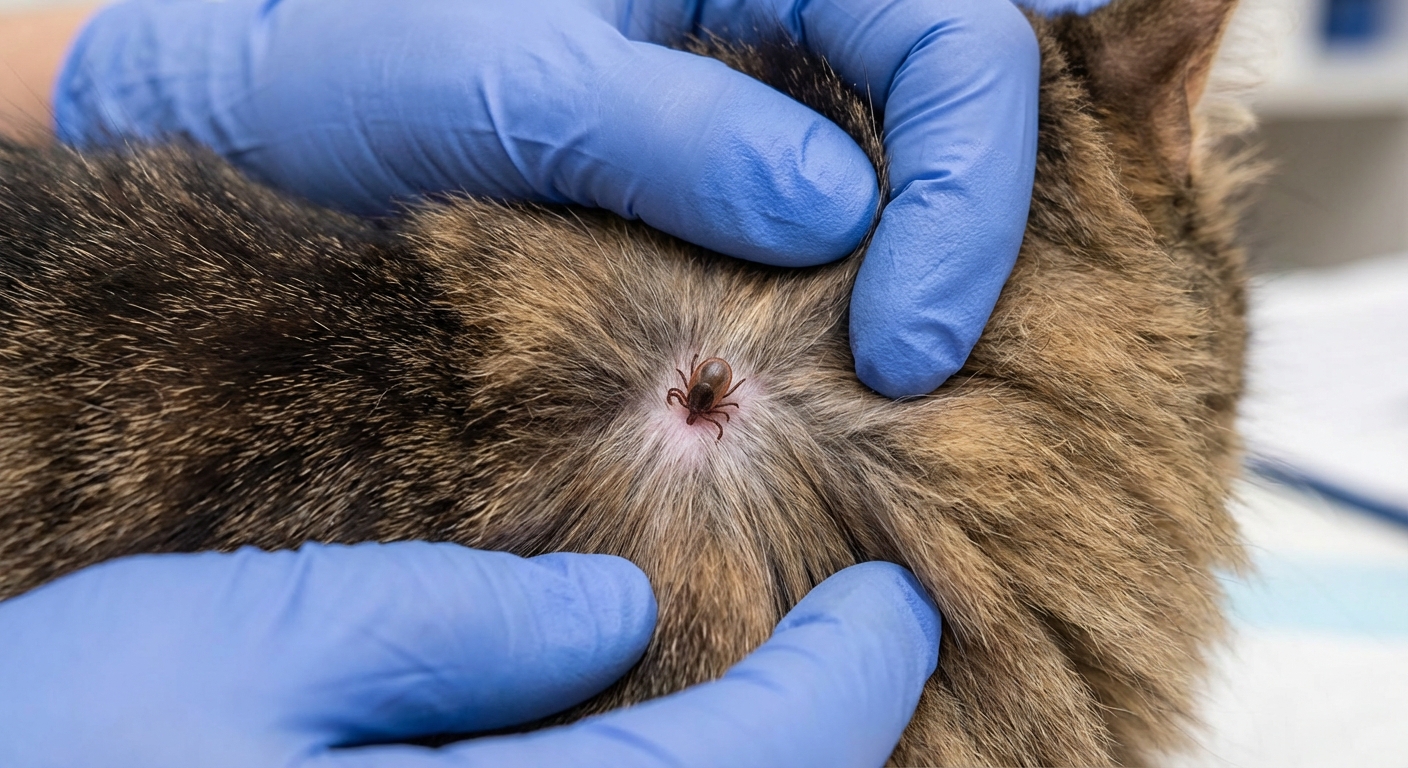
Step 2: Part the fur and confirm it is a tick
Ticks can feel like small bumps. A tick usually looks like a dark, rounded body attached to the skin. If you are unsure, take a clear photo and call your vet.
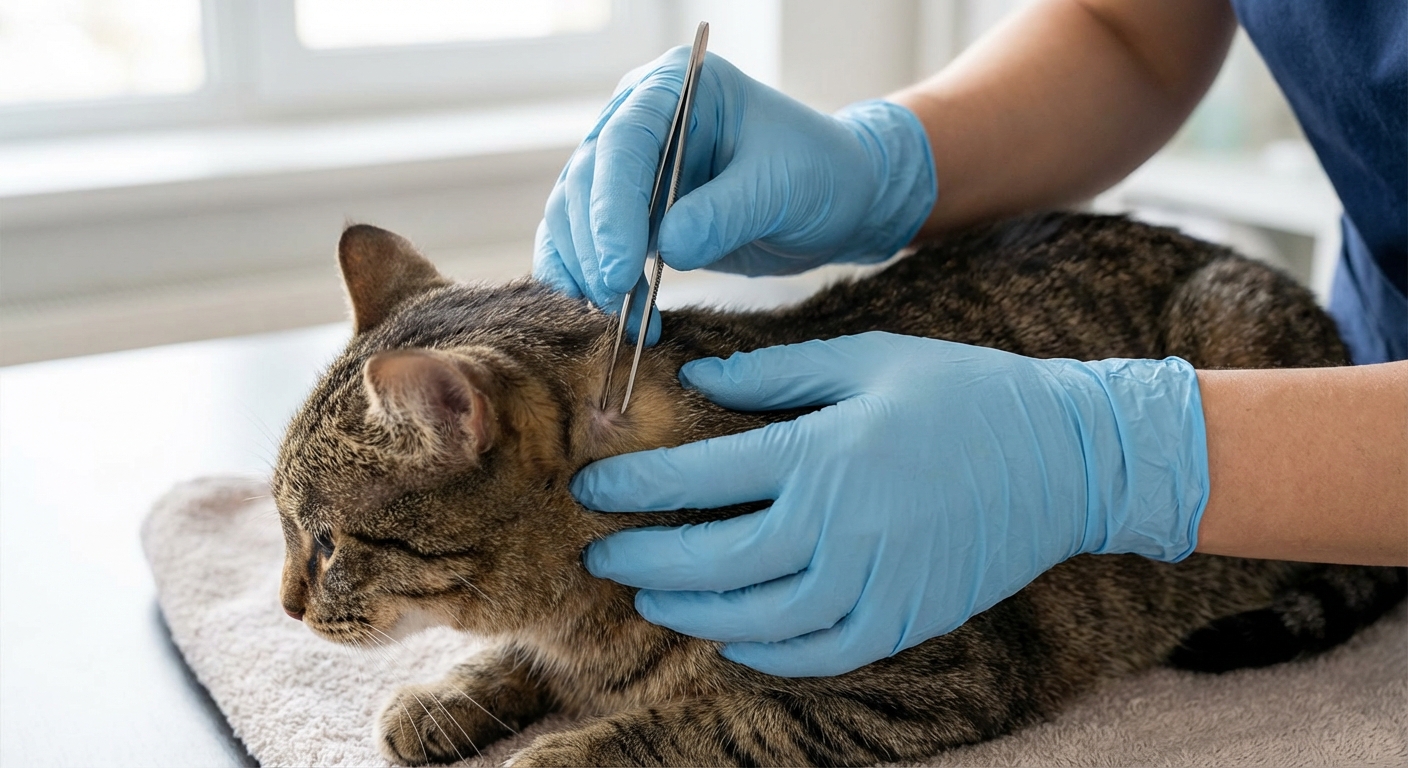
Step 3: Grab the tick at the skin line
With tweezers, grasp the tick as close to your cat's skin as possible, right where it is attached (at the mouthparts). Try not to pinch your cat's skin, and avoid squeezing the tick's swollen body.
Step 4: Pull with steady pressure
With fine-tipped tweezers, steady straight traction is typically advised. Pull upward in a slow, steady motion. Do not jerk or crush the tick. If you are using a tick tool, follow the technique recommended for that specific tool.
If the tick will not budge, your cat is in pain, or the tick tears, pause and reassess. It is okay to stop and call your vet.
Step 5: Check the area and clean gently
After removal, look at the bite site. A small red dot is common. If you have a vet-approved antiseptic, clean the area lightly. Wash your hands even if you wore gloves.
Step 6: Save or dispose of the tick
If your vet may want to identify the tick later, save it. Place it in a sealed container or bag. Some clinics prefer the tick kept dry, while others may suggest a small amount of alcohol. If you can, ask your vet which they prefer.
If you are not saving it, do not crush it with your fingers. Drop it into rubbing alcohol, seal it in a container or bag, and throw it away.
Step 7: Reward and decompress
Offer treats, gentle praise, and let your cat go relax. The emotional reset matters, especially if your cat is sensitive to handling.

What not to do
These methods can make things worse by irritating the tick or increasing the chance of infection.
- Do not use petroleum jelly, nail polish, essential oils, or dish soap to “smother” the tick
- Do not burn the tick off with a match or lighter
- Do not squeeze the tick's body while it is attached
- Do not delay removal to “watch it”
Aftercare and what to watch
Most cats do just fine after tick removal. Still, keep an eye on the bite site and your cat's overall behavior for up to 2 to 3 weeks.
Normal
- A small scab or mild redness
- Brief sensitivity if the area is touched
- A small firm bump that gradually improves over time
Call your vet if you notice
- Increasing redness, swelling, heat, or oozing at the site
- A large lump that does not improve
- Fever, low energy, reduced appetite, or hiding more than usual
- Lameness, stiffness, or reluctance to jump
- Vomiting, diarrhea, or unusual vocalizing
- Any facial swelling or hives (possible allergic reaction)
If part of the tick appears to be left behind, do not dig at the skin. Your vet can advise you. Sometimes retained mouthparts cause local irritation or a small bump and work themselves out, but worsening swelling, drainage, or pain should be checked.
Tips for easier tick checks
Tick removal is easier when your cat is comfortable being handled. A little training now can save a lot of stress later.
Build touch tolerance
- Practice short sessions, 30 to 60 seconds, a few times a week
- Gently touch ears, chin, neck, armpits, and between toes, then reward
- Stop before your cat gets annoyed, not after
Use a predictable spot
- Use the same towel, same surface, same calm voice
- Pair the spot with high-value treats
- Keep a small basket with your tick tools so you are not scrambling
Check after higher-risk time
If your cat goes outdoors, do a fast scan after yard time or hikes. Focus on warm, hidden areas: around the collar line, under the front legs, around the tail base, and inside the groin area.
Also consider doing a quick check of other pets and yourself after outdoor exposure, and wash your hands. If you were in tall grass or brush, tossing clothes in the wash is a smart extra step.
Prevention
Removing a tick is helpful, but prevention is what really protects your cat.
- Use a vet-recommended tick preventive labeled specifically for cats. Many dog products are toxic to cats, especially those containing permethrin. Always read the label.
- Keep up with dosing on schedule. Missed doses create gaps in protection.
- Reduce tick habitat by keeping grass trimmed and limiting brush piles if your cat goes in the yard.
- Check other pets in the home, especially dogs that go on walks or hikes.
If you are unsure what preventive is best, ask your veterinarian. The safest option depends on your cat's age, weight, lifestyle, and health history.
When to let the vet do it
It is not a failure to ask for help. Call your vet if:
- The tick is in or near the eye, inside the ear canal, or on the mouth
- Your cat is aggressive, panicking, painful, or you cannot safely restrain them
- Your cat is very young, frail, or medically complex
- You removed the tick but your cat seems unwell afterward
- You are seeing multiple ticks or suspect an infestation
- You are simply not sure and want a professional to do it
Calm, steady removal plus smart prevention is the winning combo. If anything feels off, trust your instincts and call your vet.