Learn veterinarian-aligned steps for treating an open wound on your dog: stop bleeding, prevent licking, clean and flush safely, bandage correctly, and recog...
Article
•
Designer Mixes
How to Treat a Cut on a Dog

Shari Shidate
Designer Mixes contributor
First: home care or vet?
Most minor cuts on dogs heal beautifully at home with calm, clean first aid. But some wounds need a veterinarian right away. As a veterinary assistant, I always tell families: when in doubt, it is safer to be seen. Dogs can hide pain, and wounds can look small on the surface while being deeper underneath.
Quick note: This is general first-aid guidance and not a substitute for an exam or diagnosis from your veterinarian.
Go to a vet urgently if you see any of these
- Bleeding that will not stop after 5 to 10 minutes of steady pressure
- Deep, gaping, or jagged edges (it may need stitches or surgical glue)
- Punctures (bite wounds, fence punctures, thorn punctures) because they seal over and trap infection
- Wounds on the face, eyelid, genitals, or near a joint
- Visible fat, tendon, or bone, or the dog will not bear weight on a limb
- Heavy contamination (dirty pond water, manure, road grime) or embedded debris you cannot remove easily
- Signs of infection: increasing redness, swelling, heat, pain, pus, foul odor, fever, marked lethargy, or weakness
- Your dog is immunocompromised or has conditions like diabetes, Cushing’s disease, or is on steroids
Before you clean: stay safe
Even the sweetest dog can snap when scared or hurting. If your dog is anxious or painful, use a calm voice, move slowly, and consider a soft muzzle if you have one and your dog can breathe comfortably through it.
- Have a helper gently hold your dog.
- Choose bright light so you can see the full wound.
- Gather supplies before you start, so you do not have to leave the dog mid-clean.
Muzzle safety: Do not muzzle a dog who is vomiting, struggling to breathe, or at risk of overheating. Use extra caution with flat-faced breeds.
Step-by-step: minor cuts
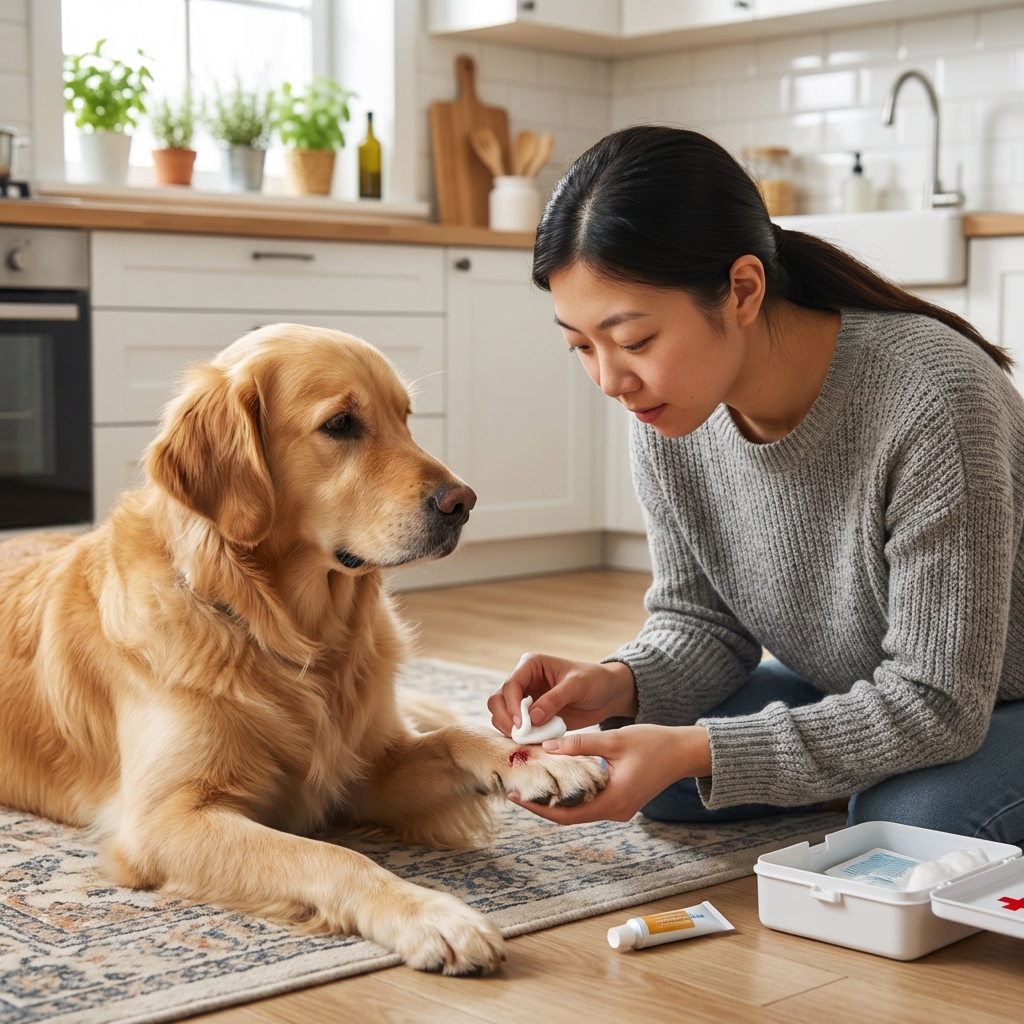
1) Stop the bleeding
Apply firm, steady pressure with clean gauze or a clean cloth for 3 to 5 minutes without repeatedly lifting to check. If blood soaks through, layer more gauze on top instead of removing the first layer.
Tip: If the cut is on a leg or paw and your dog tolerates it, gently elevate the limb while applying pressure.
2) Rinse well
For most cuts, the best first cleanser is plain sterile saline (store-bought wound wash) or clean running water if saline is not available. Rinsing removes bacteria and debris and is one of the most important steps for preventing infection.
- Use a gentle stream and take your time.
- If you have a syringe, you can use it to help flush. Avoid high-pressure jets that can damage tissue.
- If there is fur stuck in the wound, trim hair around it with blunt-tip scissors if you can do so safely.
3) Pet-safe antiseptic (optional)
After rinsing, you can use a properly diluted antiseptic to lower bacteria on the surface:
- Chlorhexidine: Aim for about 0.05% for wound cleansing. Many household chlorhexidine products are much stronger, so read labels carefully or choose a pet wound product that is ready to use. Avoid chlorhexidine products that contain alcohol on open wounds.
- Povidone-iodine (Betadine): Dilute with water until it looks like weak tea. Do not use full-strength. Avoid if your veterinarian has told you your dog has an iodine sensitivity.
Use gentle contact, do not scrub hard, and stop if your dog is very painful.
4) Protect the wound
Whether you bandage depends on location and your dog’s habits:
- Paws and lower legs often benefit from a light bandage to keep dirt out.
- Small cuts on the body sometimes heal best uncovered if your dog will leave them alone.
If you bandage, keep it snug but not tight. Toes should stay warm and normal-colored, and toenails should remain visible. If you see swelling above or below the wrap, loosen and rewrap.
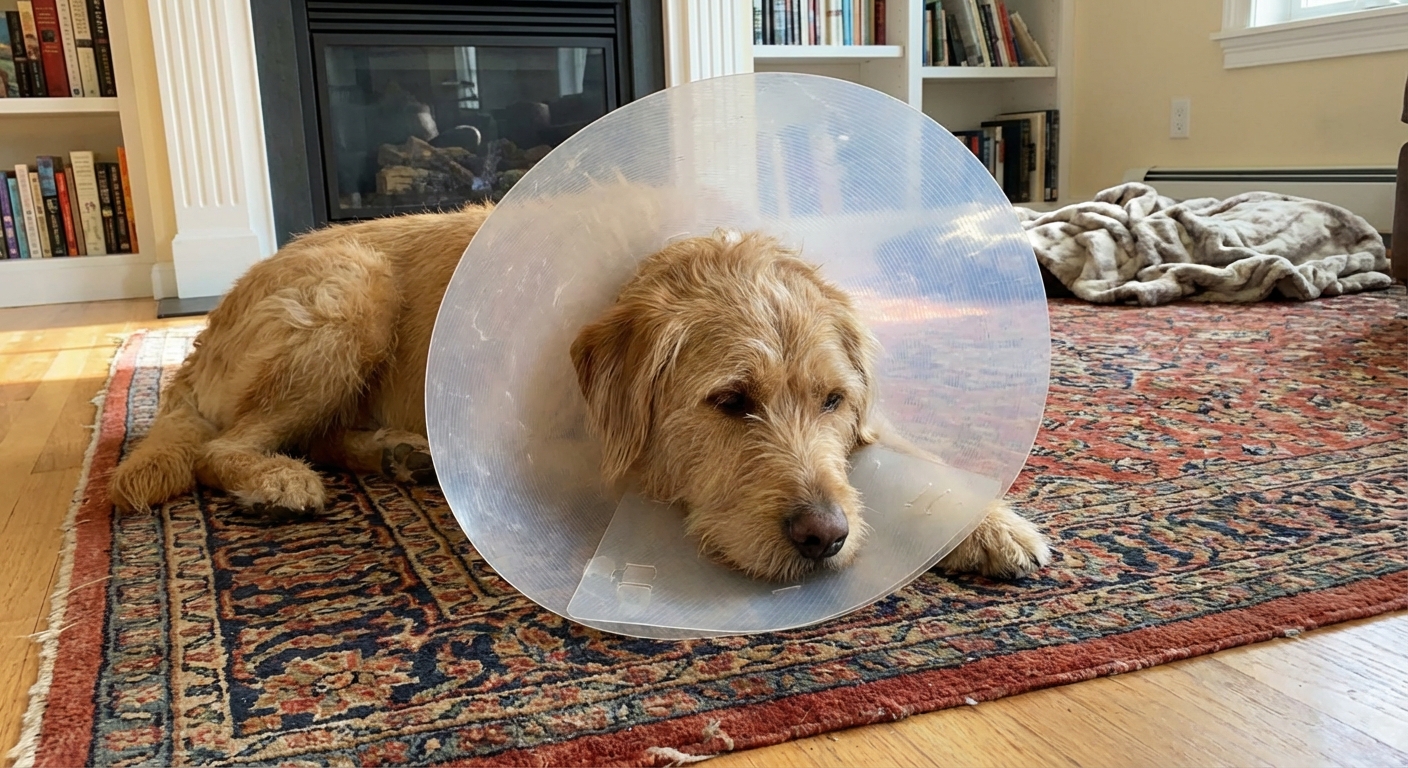
5) Stop licking and chewing
Licking introduces bacteria and can reopen healing skin. An E-collar or inflatable collar is often the fastest route to healing. If your dog can still reach the spot, upgrade to a longer cone.
6) Recheck daily
For the first few days, check the wound at least twice daily. If it is bandaged, change it daily unless your veterinarian instructs otherwise. The wound should look less red and less swollen over time, not more. If bandaged, also watch for new odor, dampness, or toe swelling.
What not to use
Some products are common in human medicine but can slow healing or be risky for pets.
- Hydrogen peroxide: can damage healthy tissue and delay healing.
- Rubbing alcohol: painful and tissue-damaging.
- Essential oils: many are irritating or toxic to pets, especially if licked.
- Powders, flour, or “home remedies”: can trap debris and bacteria.
- Human antibiotic ointments: sometimes used in tiny amounts, but many dogs lick them off, and some additives can be irritating. If you use one, avoid any “pain relief” versions and focus on preventing licking. When in doubt, ask your vet for a pet-safe option.
Important: Do not give human pain medicines like ibuprofen, naproxen, or acetaminophen unless your veterinarian tells you to. These can be dangerous for dogs.
Bandaging basics
Paw cuts are common in active dogs. The challenge is keeping them clean and dry.
Paw bandage checklist
- Non-stick pad over the wound
- Gauze roll to secure
- Self-adhering wrap on top (avoid wrapping too tight)
- Optional bootie or clean sock for short outdoor trips only
Important: Remove any outdoor covering once inside. A damp, warm bandage can become an infection incubator.
Healing timeline
Small superficial cuts often improve in 2 to 3 days and may look mostly healed in 7 to 10 days. Deeper cuts can take longer. A little redness at the edge is normal early on, but it should not spread.
Call your vet if it worsens
- Redness spreads or the area becomes hot
- Swelling increases
- Discharge appears (a small amount of clear or pale pink fluid can be normal in the first day or so, but ongoing drainage or pus is not)
- Your dog seems more painful, lethargic, or stops eating
- A foul smell develops
Special situations
Bite wounds
Even “small” bite marks can hide deeper pockets of infection. These often need a vet exam, antibiotics, and sometimes draining.
Scrapes and road rash
These can be very painful and prone to infection because the surface area is wide. Gentle rinsing, protection from licking, and close monitoring are key.
Cuts that reopen
If your dog is too active or the cut is near a joint, it may pull open repeatedly. This is a great reason to get veterinary guidance, because sometimes rest plus a stronger closure method is needed.
Simple first-aid kit
You do not need anything fancy. A small kit can make a stressful moment feel much more manageable.
- Sterile saline wound wash
- Non-stick sterile pads
- Gauze roll and self-adhering wrap
- Blunt-tip scissors
- Disposable gloves
- Chlorhexidine or povidone-iodine (for proper dilution)
- E-collar or inflatable collar
- Digital thermometer (optional but helpful)
- A syringe for gentle flushing (optional)
When you are unsure
If your dog’s cut looks worse instead of better, or something in your gut says “this is more than a simple scrape,” it is worth a call to your veterinarian. Getting a wound treated early can prevent infection, pain, and higher costs later. You are not overreacting. You are being a great advocate for your dog.
Quick FAQ
Can I use Neosporin on my dog?
It is best to ask your vet. Many dogs lick ointment off, and licking can delay healing and upset stomachs. If you use a human antibiotic ointment, avoid any “+ pain relief” versions and focus on preventing licking. Pet-specific products and proper wound protection usually work better.
Should I cover my dog’s cut?
If it is in a spot that gets dirty (like paws) or your dog will not leave it alone, a light bandage plus an E-collar can help. If it is a small cut on the body and stays clean, leaving it uncovered may be fine.
How do I know if it is infected?
Worsening redness, swelling, heat, pain, pus, odor, or your dog acting “off” are the big warning signs. If you see these, call your veterinarian.