Find a tick on your cat? Follow safe, evidence-based removal steps, what to avoid, how to clean and save the tick, aftercare signs to watch, and when to call...
Article
•
Designer Mixes
How to Remove Ticks From Cats

Shari Shidate
Designer Mixes contributor
Finding a tick on your cat can feel alarming, but the good news is that safe tick removal is very doable at home in many cases. As a veterinary assistant, I have helped with lots of tick checks and removals, and the keys are simple: use the right tool, remove the tick promptly, and watch your cat for a little while afterward.
Important note: If your cat is very anxious, the tick is in the eye area, deep inside the ear canal, between the toes with swelling, or your cat seems ill (fever, lethargy, poor appetite), it is safest to call your veterinarian for removal and guidance.
Why ticks matter for cats
Ticks are blood-feeding parasites that can cause local skin irritation and, in some areas, transmit infections. Cats are generally more fastidious groomers than dogs, so they may carry fewer ticks, but outdoor cats and indoor cats that spend time on patios, in tall grass, or around wildlife can still pick them up.
While tick-borne disease is reported more commonly in dogs, cats can still be affected. Ticks can also trigger:
- Inflammation and infection at the bite site
- Allergic-type reactions or intense itchiness
- Anemia in heavy infestations (more likely with many ticks or tiny kittens)
What to gather
Having everything ready helps you stay calm and helps your cat stay still. Here is what I recommend:
- Fine-tipped tweezers or a tick removal tool (some hook-style tools work well, but they may use a different technique than tweezers)
- Disposable gloves (optional but helpful)
- Rubbing alcohol for cleaning tweezers and the container (not for pouring on the tick or your cat’s skin unless your vet directs you)
- Soap and water for cleaning the bite site and your hands
- A small container with a lid (or a zip bag) to save the tick
- Cat-safe antiseptic recommended by your vet if skin is irritated
- Treats or a lickable snack to keep your cat occupied
Avoid “folk remedies” such as petroleum jelly, nail polish, essential oils, or trying to burn the tick off. These approaches can irritate your cat and may increase the chance of the tick releasing more saliva or gut contents into the bite.
How to remove a tick
1) Keep your cat secure
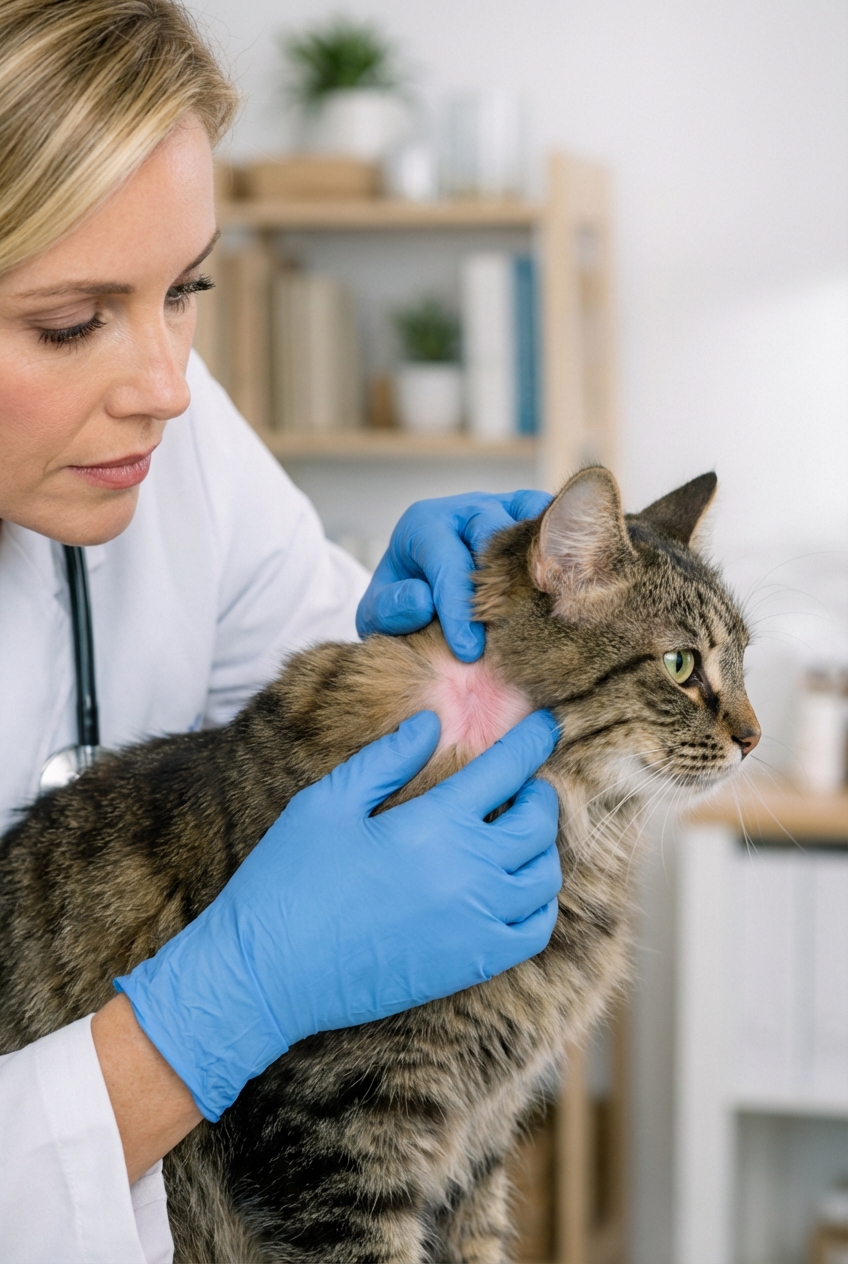
Choose a well-lit spot. Many cats do best on a towel on your lap or a counter. If your cat is wiggly, you can gently wrap them in a towel like a “kitty burrito,” leaving the tick area exposed.
2) Part the fur and find the attachment point
Ticks often attach around the head and neck, under the collar, behind the ears, and in the armpit or groin area. Separate the hair so you can clearly see where the tick’s mouthparts enter the skin.
3) Grasp the tick close to the skin
Using fine-tipped tweezers, grab the tick as close to your cat’s skin as possible, aiming for the mouthparts. Keep the tweezers as parallel to the skin as you can to avoid pinching your cat. Try not to squeeze the tick’s swollen body.
4) Remove with steady pressure
If you are using tweezers: pull straight out with firm, even pressure. Do not jerk.
If you are using a hook-style tick tool: follow the manufacturer’s directions closely, since some are designed to use a gentle lifting and twisting motion. The goal is still the same: a clean, complete removal without crushing the tick.
5) Check that the tick is intact
If the tick comes out whole, great. If you suspect the mouthparts broke off, do not dig aggressively into the skin. Call your vet for advice, especially if the area becomes red, swollen, painful, or oozes.
6) Clean the bite site and your hands
Gently clean the area with mild soap and water. If your veterinarian has recommended a specific pet-safe antiseptic, you can use it as directed. Wash your hands even if you used gloves.
7) Save the tick (optional, but helpful)
Place the tick in a sealed container and note the date and where on your cat you found it. If your cat develops symptoms later, your veterinarian may want to know what kind of tick it was. Storage preferences vary by clinic and lab, so if you think testing might be needed, ask your vet whether they want the tick dry, in a bag, or preserved.
What not to do
- Do not use essential oils (many are toxic to cats and can be absorbed through the skin)
- Do not apply heat (matches, lighters, hot objects)
- Do not smother the tick with petroleum jelly or similar products
- Do not crush the tick with your fingers
- Do not use dog-only tick products on cats (some contain ingredients that can be dangerous to cats)
Aftercare and monitoring
Most cats feel totally fine after removal, but keep an eye on your cat and the bite site for the next couple of weeks. Some tick-borne illnesses can take longer to show up, so if symptoms appear later, it is still worth mentioning the tick exposure to your vet.
Contact your veterinarian if you notice:
- Worsening redness, swelling, warmth, or discharge at the bite
- Fever, low energy, hiding more than usual
- Poor appetite or vomiting
- Lameness or pain
- Pale gums (possible anemia, especially concerning in kittens)
If something feels “off,” trust your gut and call your vet. Early care is almost always easier than waiting.
How to check for ticks
Tick checks are especially helpful after outdoor time or hikes. Use your fingertips to feel for small bumps, then part the fur to look closely. Focus on:
- Head and chin
- Behind the ears and inside the outer ear flap
- Neck and under the collar area
- Armpits and front legs
- Groin and base of the tail
- Between toes
One tick sometimes means there is another, so a quick full-body check is a smart habit.
Tick prevention for cats
Removing one tick is helpful, but preventing ticks is what protects your cat long term. The safest approach is to ask your veterinarian which prevention fits your cat’s age, weight, lifestyle, and health history. Most effective options are species-specific, and many are prescription products.
Common options
- Topical preventives applied to the skin (often monthly)
- Oral preventives (not right for every cat, and availability varies by region)
- Tick collars made specifically for cats
Safety reminder: Never apply dog tick products to cats unless your veterinarian explicitly tells you it is safe. Cats are uniquely sensitive to certain ingredients.
Home and yard tips
- Keep grass trimmed and remove leaf litter
- Create a barrier of gravel or mulch between wooded areas and your yard
- Discourage wildlife (like rodents) around the home when possible
- Wash bedding routinely if your cat goes outdoors
When to go to the vet
Even though at-home removal is often fine, your veterinarian is the best choice if:
- The tick is attached near the eye, on the eyelid, or deep in the ear
- Your cat is aggressive, panicked, or cannot be safely restrained
- You see multiple ticks or suspect an infestation
- The bite site is infected or very swollen
- Your cat is a kitten, senior, pregnant, or immunocompromised
- Your cat has symptoms like fever, weakness, or pale gums
Disposal and safety
- Dispose of the tick safely: seal it in tape or a container and throw it away, unless you are saving it for identification.
- Do not flush ticks, and avoid crushing them with bare hands.
- Protect people in the home: ticks can carry diseases that affect humans too, so wash your hands and keep the tick away from children and other pets.
Quick FAQ
How soon should I remove a tick?
As soon as you notice it. Prompt removal reduces irritation and can lower the risk of disease transmission.
What if I cannot get the whole tick out?
Do not dig into the skin. Clean the area and call your veterinarian for next steps.
Should I get my cat tested for tick-borne diseases?
Testing is not always needed after a single tick, especially if your cat has no symptoms. If your cat becomes ill, your vet will guide you on the right diagnostics based on symptoms and local tick risks.