Step-by-step dog tick removal with tweezers, what to do if mouthparts remain, aftercare warning signs, and proven prevention plus home and yard tick control ...
Article
•
Designer Mixes
How to Remove a Tick From a Dog

Shari Shidate
Designer Mixes contributor
Finding a tick on your dog can feel alarming, especially the first time. Take a breath. In most cases, you can remove a tick safely at home if your dog is stable and you have the right tools. As a veterinary assistant here in Frisco, Texas, I have helped with lots of tick removals, and the goal is always the same: remove the tick quickly, remove it whole if possible, and protect the skin from infection.
This step-by-step guide walks you through exactly what to do, what not to do, and when it is time to call your vet. It is educational and does not replace veterinary advice for your specific dog.
Why fast removal matters
Ticks can carry diseases that affect dogs and people. Not every tick is infected, and not every bite leads to illness, but removing ticks promptly lowers risk.
Important: Time-to-transmission depends on the disease, tick species, and other factors. Some pathogens often require many hours of attachment (commonly cited as 24 to 48+ hours for certain diseases), but that is not a guarantee. Earlier removal is still better.
Also, ticks can cause local skin irritation, small infections at the bite site, and occasionally anemia if there is a heavy infestation.
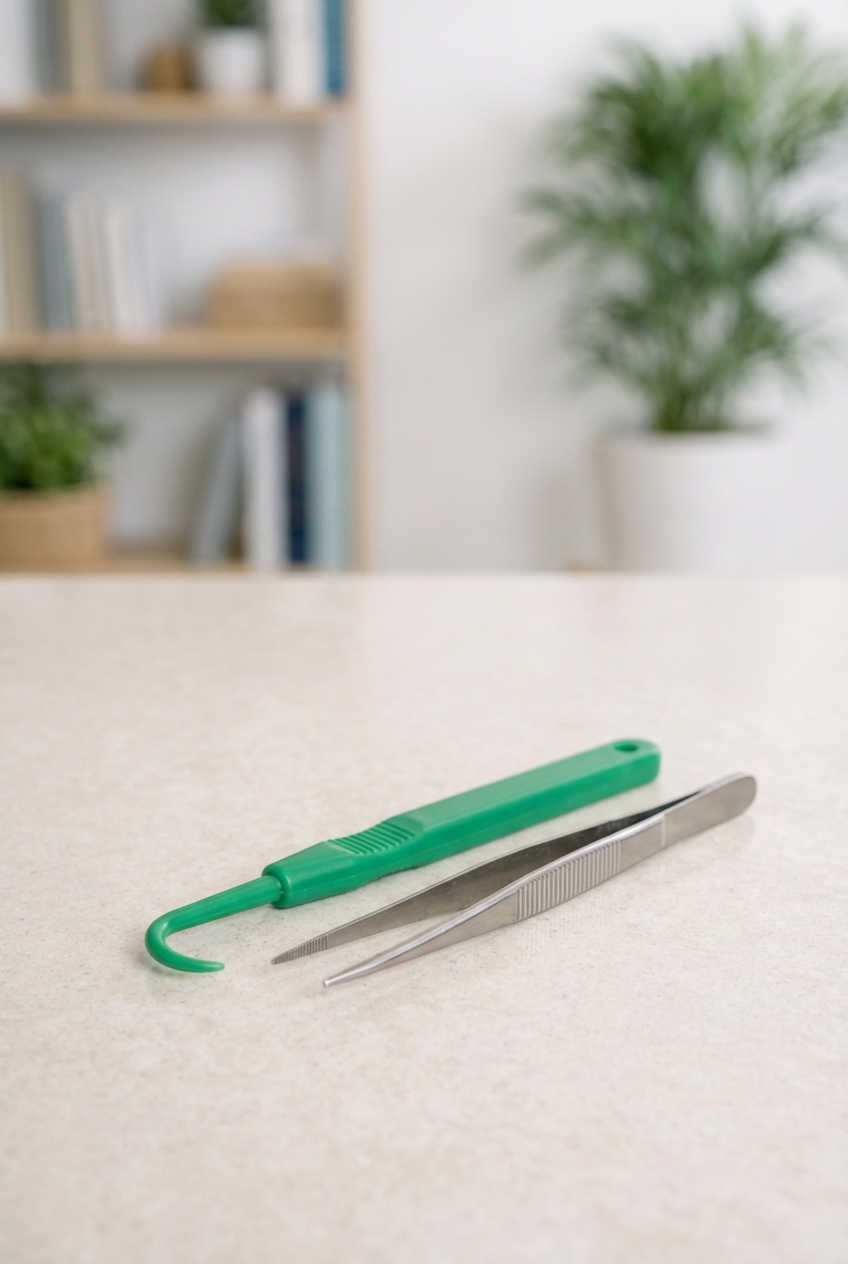
What you need
Having the right supplies makes removal cleaner and less stressful for you and your pup.
- Fine-tipped tweezers or a tick removal tool (hook style is great for dense coats)
- Disposable gloves (recommended)
- Good lighting and, if possible, a helper to hold and soothe your dog
- Isopropyl alcohol (rubbing alcohol) (for disinfecting tools and to store the tick if needed)
- Antiseptic safe for pets (chlorhexidine solution or dilute povidone-iodine, if you have it)
- Treats for calm cooperation
- Small container with a lid or a zip bag
Tip: If your dog is wiggly or anxious, do the removal after a walk or play session when they are naturally calmer. A lick mat or a small smear of peanut butter can help some dogs stay still, but only use it if it is safe for your dog and you can supervise closely.
Step-by-step tick removal
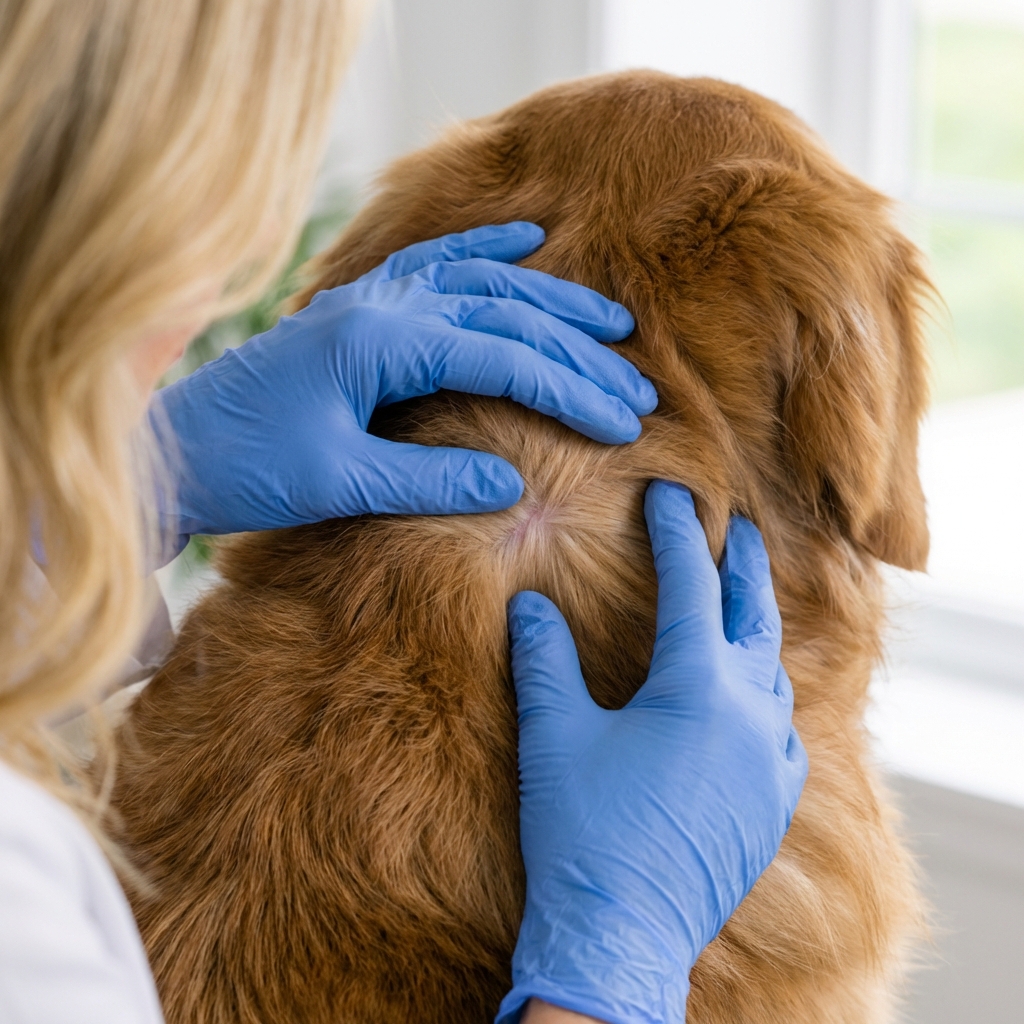
1) Part the fur and confirm it is a tick
Use your fingers to part the hair around the bump. Ticks can look like small gray, brown, or black “seeds,” and you may see tiny legs near the skin. If you are unsure, take a clear photo and compare it to reputable images from your veterinarian, a university extension site, or the CDC, or call your vet for guidance.
2) Put on gloves and disinfect your tool
Gloves protect you from exposure to tick fluids. Wipe tweezers or your tick tool with isopropyl alcohol first.
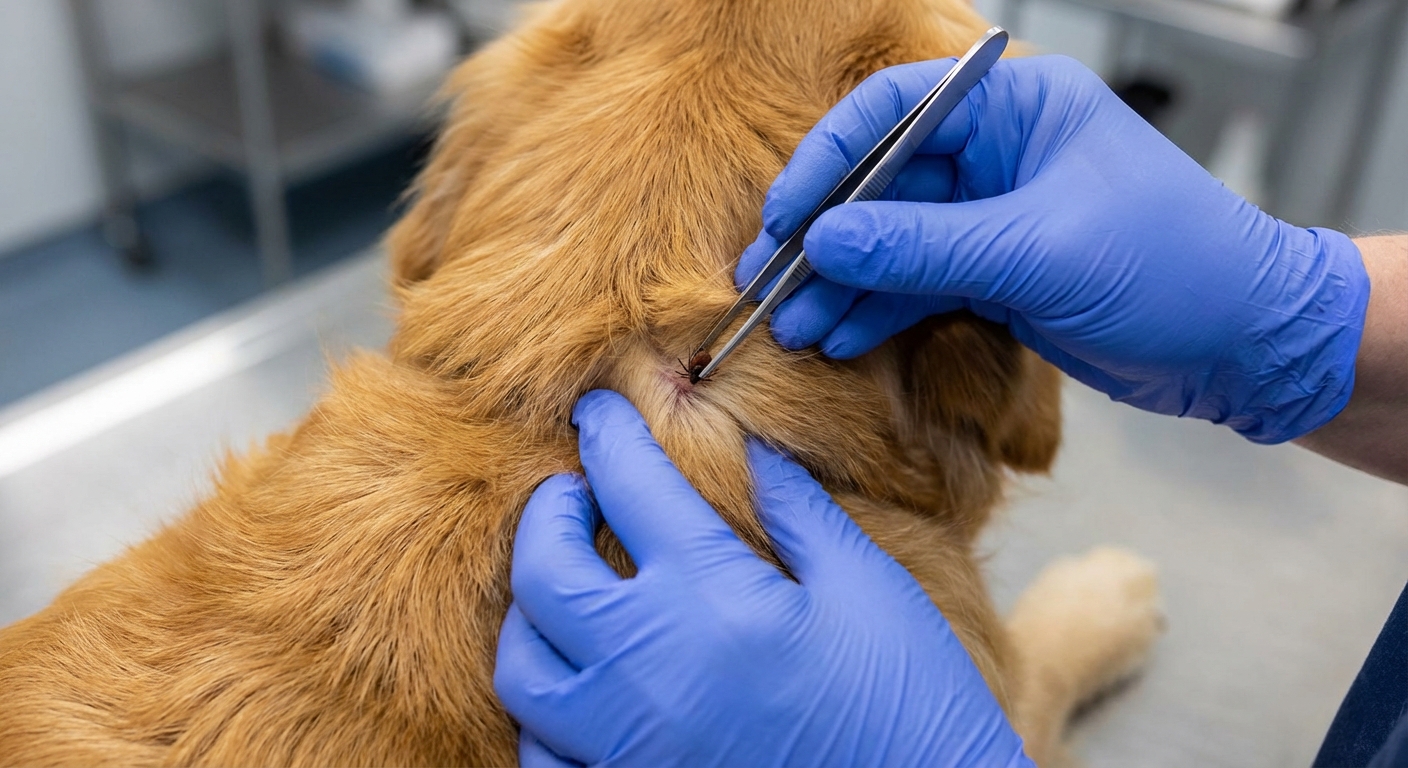
3) Grab the tick close to the skin
With tweezers: grasp the tick as close to your dog’s skin as possible, aiming for the tick’s mouthparts. Avoid squeezing the swollen body.
With a tick hook: slide the notch under the tick from the side until the tick is securely captured at the narrowest point.
4) Remove with steady pressure
If you are using tweezers: pull straight out, perpendicular to the skin, with steady, even pressure. Do not twist or jerk.
If you are using a tick hook: follow the manufacturer’s instructions. Some hook-style tools are designed to use a gentle lift and rotation to disengage the tick. The key is controlled, steady motion rather than a quick yank.
5) Check that the tick is whole
Look at the tick. Ideally, the head and mouthparts come out with the body. If you suspect tiny mouthparts remain, do not dig aggressively in the skin. The area may heal on its own, but it is a good idea to call your vet if you are concerned, if the site is very inflamed, or if the area seems painful to your dog.
6) Clean the bite site
Clean the area with a pet-safe antiseptic. You can also gently wash with mild soap and water if that is what you have on hand, then pat dry.
7) Dispose of the tick safely
Place the tick in a small container with isopropyl alcohol or seal it in a zip bag. Do not crush a tick with your fingers. If your dog becomes ill later, your vet may want to know what the tick looked like and when it was removed. If your vet recommends tick testing, ask how they prefer it stored, since alcohol is not ideal for every type of testing.
8) Wash your hands and reward your dog
Even with gloves, wash your hands after. Then give your dog praise and a treat. This helps future grooming and tick checks go more smoothly.
One more thing: Do a quick scan for additional ticks, especially around the ears, collar line, between toes, armpits, and groin. If you found several ticks, consider washing bedding and heat-drying it to help reduce any hitchhikers in your home.

What not to do
- Do not use petroleum jelly, nail polish, gasoline, or essential oils to “smother” a tick. These methods can irritate skin and may increase the chance of regurgitation into the bite.
- Do not burn the tick with a match or lighter. This can injure your dog and is unsafe.
- Do not jerk the tick out with force. Quick pulls can break the tick. (Twisting is only for specific hook tools if the instructions call for it.)
- Do not squeeze the tick’s swollen body. This can push fluids out and increases mess and exposure.
Aftercare for 30 days
Most dogs do perfectly fine after a tick bite. Still, I recommend monitoring for symptoms because tick-borne illness can show up days to weeks later.
Call your vet if you notice:
- Low energy, weakness, or acting “off”
- Fever
- Loss of appetite
- Limping, stiffness, or joint pain
- Vomiting or diarrhea
- Swollen lymph nodes
- Unusual bruising or nosebleeds
Also call your vet if the bite site becomes very red, hot, swollen, oozing, or forms a growing lump.
Urgent note: Tick paralysis is rare, but it can happen. If your dog suddenly becomes wobbly, weak, has trouble standing, or has any breathing difficulty, seek urgent veterinary care right away.
When not to remove at home
Home removal is usually safe, but there are times it is better to let a veterinary team handle it.
- Your dog is aggressive, highly fearful, or will not hold still
- The tick is near or on the eyelid, inside the ear canal, lip line, or genital area
- You see many ticks (this may require full-body assessment and parasite control)
- The skin is already infected or very painful
- You tried and mouthparts appear embedded and the area is inflamed
Tick prevention
Removal is important, but prevention is the real win for long-term health.
Best prevention habits
- Use a vet-recommended tick preventive consistently (oral chew, topical, or collar). Ask your veterinarian which option fits your dog’s age, weight, and lifestyle.
- Protect all pets in the household with species-appropriate products. Never use dog-only products on cats unless your veterinarian specifically approves it.
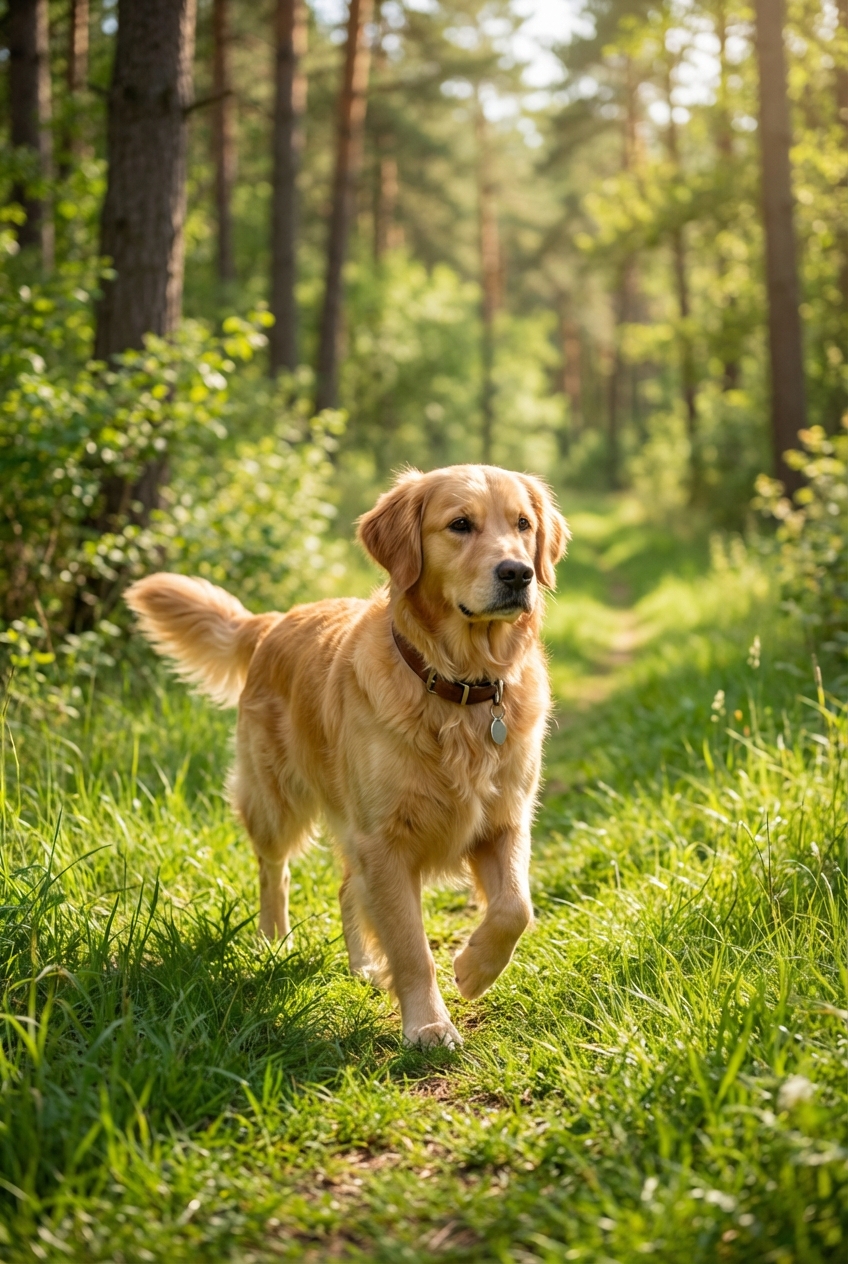
- Do tick checks after walks, hikes, dog parks, and time in tall grass.
- Focus on common hiding spots: around ears, under collar, between toes, armpits, groin, and under the tail.
- Keep your yard trimmed. Short grass and reduced brush make ticks less likely.
Quick FAQ
What if the tick’s head is stuck?
Often what people call the “head” is actually irritated skin or a small scab. If mouthparts truly remain, do not dig. Clean the area and monitor. Contact your vet if swelling, pain, discharge, or a persistent lump develops.
Should I save the tick?
Yes, it can be helpful. Place it in alcohol or a sealed bag, note the date, and where on the body you found it. If testing is a possibility, ask your vet how they want it stored.
Can ticks spread to people?
Ticks can hitch a ride indoors, so check yourself and family members after outdoor time, especially if you have a dog that likes to explore brushy areas.
Bottom line: Use the right tool, remove the tick with steady control, clean the skin, and monitor your dog. If the tick is in a delicate spot or your dog seems unwell, call your veterinarian right away.