A practical vet-assistant guide to ear mites in dogs—spot the signs, confirm diagnosis, choose effective medications, clean ears safely, treat all pets, an...
Article
•
Designer Mixes
How to Get Rid of Ear Mites in Dogs

Shari Shidate
Designer Mixes contributor
Ear mites are one of those problems that can make an otherwise happy dog absolutely miserable. If your dog is shaking their head constantly, scratching at their ears, or you are seeing dark, crumbly ear debris, you are right to suspect ear mites. The good news is that ear mites are very treatable. The key is doing it safely, thoroughly, and long enough to break the life cycle.
As a veterinary assistant here in Frisco, Texas, I have seen ear issues that look like mites but turn out to be infections, allergies, or a ruptured eardrum. So I am going to walk you through what ear mites are, how to confirm them, what actually works, and what to avoid.
What ear mites are and why they are so itchy
Ear mites, most commonly Otodectes cynotis, are tiny parasites that live in the ear canal and feed on skin debris and ear wax. They cause intense irritation, inflammation, and that classic dark, “coffee-ground” looking debris.
Mites are contagious. Dogs catch them most often through direct contact with other dogs or cats. Less commonly, they can spread via contaminated bedding or grooming tools soon after an infested pet has used them. In multi-pet homes, mites often spread quickly.
Quick human note: ear mites are primarily a pet problem, but in rare cases they can cause temporary, itchy skin irritation in people. If anyone in the home develops an unexplained rash after a pet’s mite outbreak, check in with a healthcare professional.
Signs that look like ear mites
Many ear problems share symptoms, so think of this as a “possible ear mites” checklist, not a final diagnosis:
- Frequent head shaking
- Scratching at the ears, rubbing the head on carpet or furniture
- Dark brown or black crumbly debris in the ear
- Red, inflamed ear canal
- Unusual ear smell (this can also suggest yeast or bacterial infection)
- Sores or scabs around the ear from scratching
- Ear sensitivity or pain when touched
If your dog seems painful, cries, holds the head tilted, or suddenly loses balance, that is more urgent. Those signs can indicate a middle or inner ear issue, not just mites.
How vets confirm ear mites
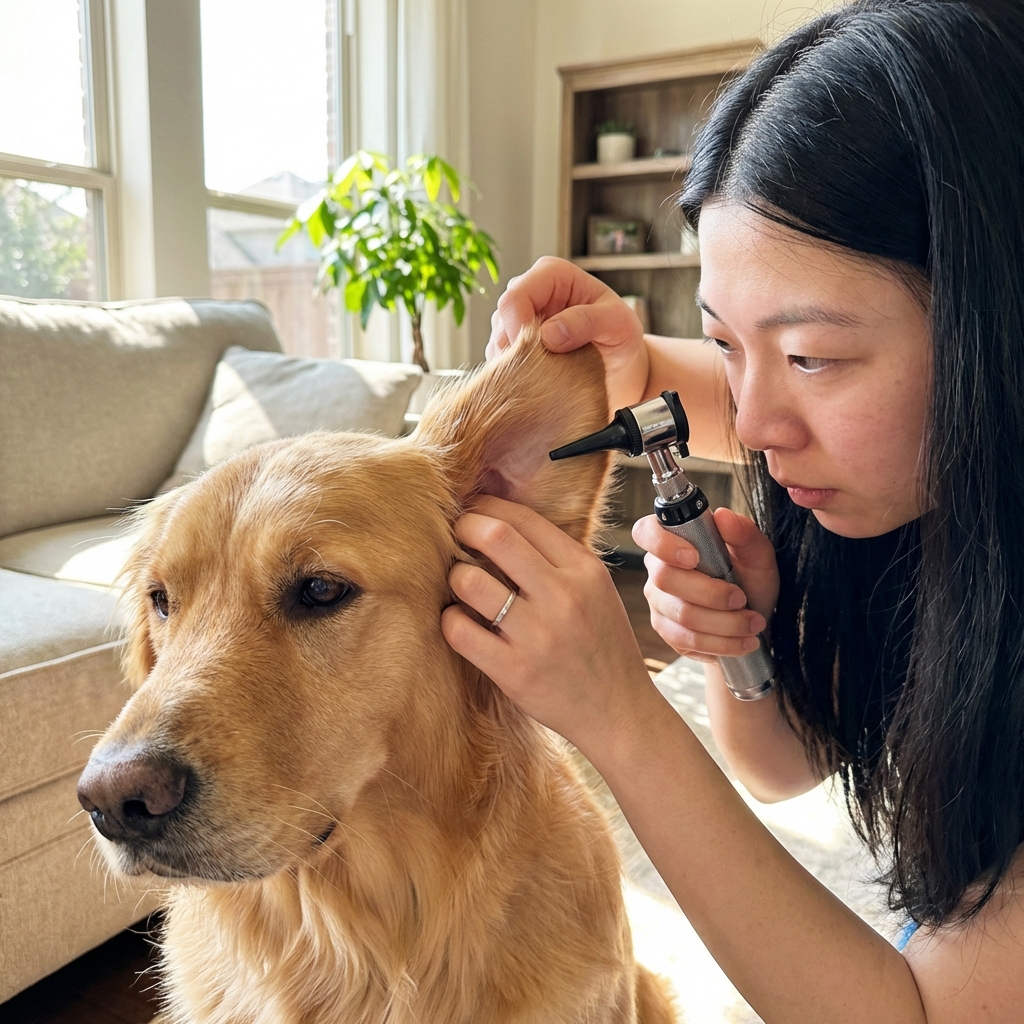
The most reliable way to diagnose ear mites is with an ear exam and testing. In clinic, we typically:
- Look in the ear with an otoscope to check for debris, swelling, and eardrum health
- Take an ear swab and look under a microscope for mites, eggs, and secondary infection
This matters because a dog can have ear mites and a yeast or bacterial infection at the same time. If you treat only the mites, the infection can continue to cause pain and inflammation.

When to skip home trial-and-error: If the ear is very swollen, bleeding, extremely painful, has a strong smell, or your dog seems off-balance, make a vet visit. Also see your vet if your dog has had chronic ear problems, because allergies can be the real driver.
What actually gets rid of ear mites
To get rid of ear mites, you need to do two things:
- Kill the mites (including newly hatched mites over time)
- Clean out debris so medication can reach where mites live
Step 1: Use a vet-recommended mite treatment
These are the treatments with the strongest evidence and reliability:
- Prescription topical medications applied in the ear canal (your vet chooses based on what they see and whether infection is present)
- Prescription parasiticide preventives (some monthly flea and tick products also treat ear mites, including several modern systemic options used under veterinary guidance)
Treatment length is important. Ear mite life cycles are roughly 3 to 4 weeks, so many protocols treat for multiple weeks to catch newly hatched mites. Always follow your veterinarian’s exact instructions and do not stop early just because the scratching improves.
Reinfestation tip: treat all in-contact pets at the same time when your veterinarian recommends it, and complete the full course. This is one of the biggest keys to preventing the “it came right back” situation.
Step 2: Clean the ears correctly
Cleaning helps remove the irritating debris and improves the effectiveness of medication. A gentle, dog-safe ear cleaner is best.
Important safety note: if you suspect a ruptured eardrum (severe pain, sudden head tilt, loss of balance, or your dog yelps when the ear is touched), do not put cleaner or medication in the ear until your vet has checked the eardrum.
Basic technique:
- Use a veterinarian-approved ear cleaner. Avoid hydrogen peroxide, alcohol, or essential oils.
- Fill the ear canal with cleaner as directed on the label.
- Massage the base of the ear for 20 to 30 seconds. You should hear a soft “squishing” sound.
- Let your dog shake their head.
- Wipe away loosened debris with cotton rounds or gauze on the visible part of the ear.
- Do not push cotton swabs deep into the ear canal.
If the ear is too painful to clean, stop and call your vet. Forcing it can make things worse.
Do you need to treat both ears?
Often, yes. Even if only one ear looks bad, mites can be present in both ears. Many veterinarians treat both as a practical rule, but follow your specific instructions.
Should you treat other pets and your home?
Other pets
In multi-pet households, it is very common for more than one pet to be affected. Cats are especially frequent carriers. Ask your vet whether all pets should be treated, even if only one is showing symptoms.
Your home
Ear mites mainly live on the animal, not in carpets the way some other pests do. Still, basic hygiene helps:
- Wash bedding on hot
- Vacuum areas where pets sleep
- Clean grooming tools
What not to do
- Using “home remedies” like vinegar, alcohol, hydrogen peroxide, or essential oils. These can sting, cause chemical irritation, and worsen inflammation in an already angry ear.
- Using leftover ear medication from a previous problem. Old meds may be expired, inappropriate for the current issue, or unsafe if the eardrum is compromised.
- Stopping treatment too soon. Symptoms can improve before all mites and eggs are cleared.
- Cleaning too aggressively. Over-cleaning can worsen inflammation.
If your dog is in pain, the ear smells strongly, or the ear canal looks very swollen, treat this like a medical visit, not a DIY project. Comfort matters, and ears can go downhill quickly.
How long until your dog feels better?
Many dogs feel relief within a few days of starting effective treatment, especially once the ear is cleaned and the itch cycle slows down. Full resolution can take a couple of weeks or longer, depending on how severe the infestation is and whether there is a secondary infection.
If you are not seeing steady improvement within 5 to 7 days, call your veterinarian. That can mean:
- The problem is not mites (or not only mites)
- A secondary infection needs treatment
- The dog has an underlying allergy that keeps inflaming the ear
Prevention tips that really help
- Keep pets on consistent parasite prevention if your vet recommends it for your area and your dog’s lifestyle.
- Check ears weekly, especially for floppy-eared dogs or dogs who swim.
- Dry ears after baths and swimming with a towel. Moisture can fuel infections.
- Address allergies early. Chronic inflammation makes ears more vulnerable to any ear trouble.
- Avoid sharing bedding with pets that are actively scratching and untreated.

If you take one thing from this article, let it be this: ear mites are very fixable, but ear pain is not something a dog should have to “tough out.” With the right diagnosis and a complete course of treatment, most dogs get back to comfortable, happy ears quickly.