
Hands-off slow cooker dog food for busy owners: 3 easy recipes (chicken/rice, turkey/sweet potato, beef/pumpkin) plus calcium guidance, safe ingredients, por...
Article
•
Designer Mixes
How to Get Rid of Dog Ticks

Shari Shidate
Designer Mixes contributor
Ticks are one of those issues that can seem minor until they cause a very real problem. As a veterinary assistant here in Frisco, Texas, I have seen how quickly a tick bite can turn into days of itching, an irritated hot spot, a skin infection, or a preventable tick-borne illness.
The good news is that most ticks can be removed safely at home if you act promptly and use the right technique. Below, I’ll walk you through what to do right now, what to watch for afterward, and how to keep ticks from coming back.
Why ticks are a big deal
Ticks are not just gross hitchhikers. They feed on blood, irritate the skin, and can transmit disease. In the U.S., ticks can carry illnesses such as Lyme disease, ehrlichiosis, anaplasmosis, Rocky Mountain spotted fever, and babesiosis. Dogs can also develop local reactions, including redness, swelling, scabs, and secondary bacterial infections from scratching.
Ticks do not “jump” like fleas, but they do climb and grab onto fur when your dog brushes past grass, weeds, brush, leaf litter, or wildlife trails.
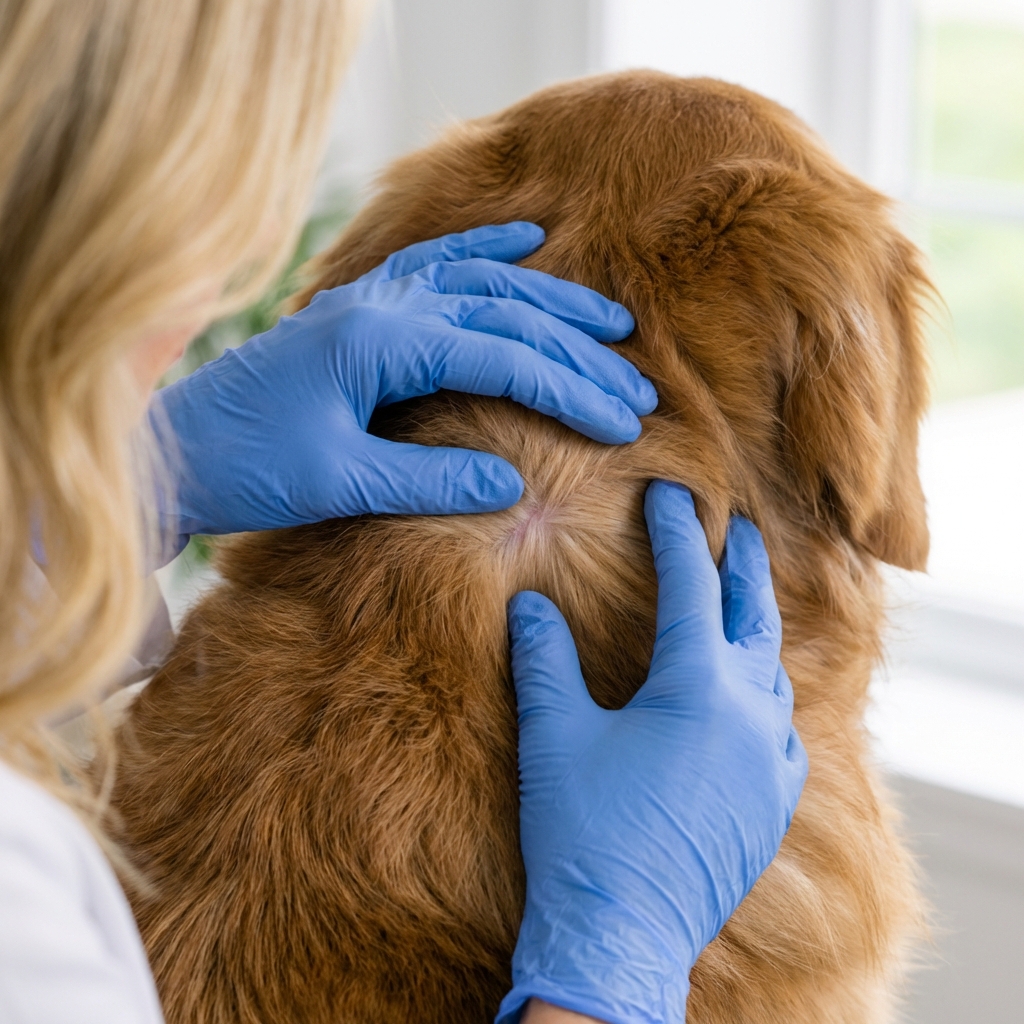
First: check your dog the right way
A quick tick check after walks is one of the most effective habits you can build, especially during warm months and in wooded or grassy areas.
If you are not sure what you are feeling for, a tick can feel like a small, firm bump. Depending on whether it has fed, it may look and feel anywhere from a sesame seed to a small pea.
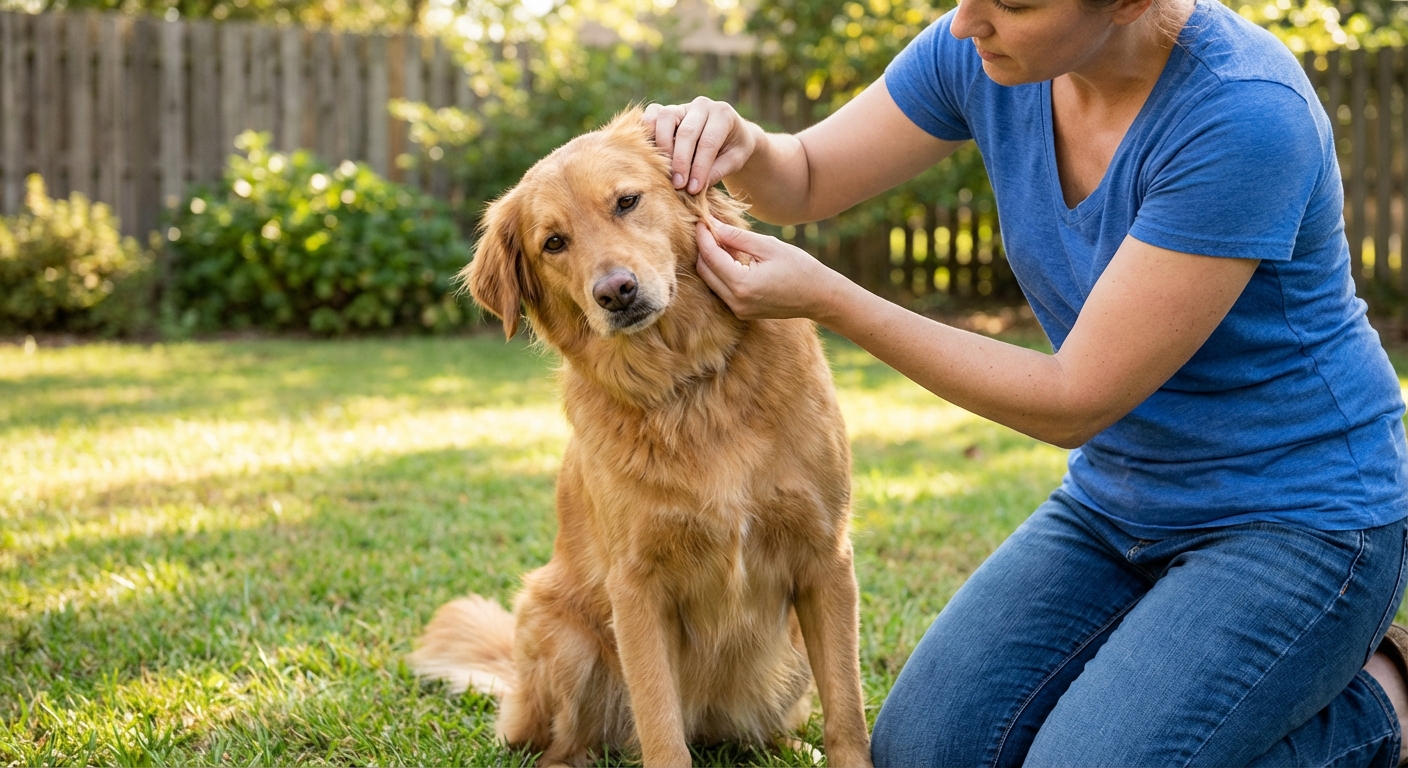
Where ticks like to hide
- Inside and around the ears
- Under the collar and on the neck
- Between toes and around nail beds
- Armpits and groin
- Under the tail
- Along the face and around the eyes
Run your hands slowly over the coat and feel for small bumps. Use a fine-tooth comb on longer coats. If you find a tick, remove it as soon as you can.
How to remove a tick safely (step-by-step)
The goal is simple: remove the tick promptly without crushing it and without leaving mouthparts embedded. If you can, wear disposable gloves.
If the tick is attached near the eye, inside the ear (especially down in the canal), or in another delicate spot, it is safer to have your veterinarian remove it.
What you need
- Fine-tipped tweezers or a tick-removal tool
- Rubbing alcohol (isopropyl) or mild soap and water
- Gauze or paper towels
- A small container or zip bag (to save the tick if needed)
Steps
- Part the fur and get good lighting so you can see the tick clearly.
- Grab close to the skin using tweezers, as close to the tick’s mouthparts as possible.
- Pull straight out with steady, even pressure. Do not twist, jerk, or squeeze the body.
- Clean the area with soap and water or a small amount of rubbing alcohol (isopropyl) on gauze.
- Dispose of or save the tick by placing it in rubbing alcohol (isopropyl) or sealing it in a bag. Saving it may help your veterinarian identify the tick species and estimate risk, but not every clinic tests ticks in-house, so ask your vet what they prefer.
- Wash your hands and disinfect the tweezers.
Skip the old advice like burning the tick, smearing petroleum jelly, nail polish, or essential oils. These approaches can irritate the skin, delay removal, and may cause the tick to release more saliva or gut contents while it is still attached.
What if mouthparts stay in?
This is common and understandably stressful. When people say the “head” broke off, it is usually small mouthparts that remain. The skin may look like there is a tiny splinter. Sometimes the body will naturally push it out over a few days.
- If you can remove it easily with clean tweezers, you can try.
- If it is deeply embedded, do not dig aggressively. You can create a bigger wound.
- Keep the area clean and monitor for redness, swelling, discharge, or increasing pain.
If the site looks infected, your dog is very bothered by it, or you are unsure whether you removed the entire tick, call your veterinarian. They can remove remaining parts safely and prescribe medication if needed.
Aftercare: what to watch for
Most dogs do perfectly fine after a tick is removed, but tick-borne illnesses can show up days to weeks later. A common guideline is to monitor closely over the next several weeks (often up to 30 days, and sometimes longer).
It is also normal to see a small red bump or mild irritation where the tick was attached. Call your vet promptly if you notice worsening redness, heat, swelling, pus, significant pain, or if your dog keeps obsessively licking or scratching the area.
Call your vet promptly if you notice:
- Fever, low energy, or acting “off”
- Loss of appetite
- Limping or shifting leg lameness
- Swollen joints
- Vomiting or diarrhea
- Unusual bruising, bleeding, or pale gums
- New, widespread rash or hives
If you know the approximate date of the bite, write it down. It can also help to take a quick photo of the tick and the bite site, note where it was on your dog’s body, and estimate how long it may have been attached. That timeline helps your veterinary team choose the right tests.
One more safety note: ticks can bite people, too. After outdoor time or handling ticks, check yourself and wash your hands well.
How to get rid of ticks in your home and yard
Ticks usually come from outdoors, but once they hitch a ride inside, you want to reduce the chance of reattachment.
Inside your home
- Wash bedding (dog beds, blankets, crate pads) in hot water and dry on high heat.
- Vacuum carpets, rugs, baseboards, and furniture where your dog rests. Empty the canister outdoors or seal vacuum contents in a bag.
- Check other pets in the home, even cats, since ticks do not respect species.
In your yard

- Keep grass trimmed and remove leaf litter and brush piles.
- Create a mulch or gravel barrier between wooded areas and play spaces when possible.
- Discourage wildlife (deer, rodents) by securing trash and limiting attractants.
- If ticks are heavy in your area, ask your veterinarian about safe yard treatments and integrated pest control options.
Prevention that works
If you only take one thing from this article, let it be this: tick prevention is easier than tick treatment. Risk generally increases the longer a tick stays attached, so finding ticks early and keeping your dog on a reliable preventive makes a big difference.
Veterinary preventives
There are several evidence-based options, and the best one depends on your dog’s age, weight, health history, and lifestyle:
- Oral chewables (systemic medications that kill ticks after they bite)
- Topical spot-on products (applied to the skin, often monthly)
- Tick collars (long-lasting, but must fit properly and be used safely)
Use products labeled specifically for dogs, and follow the weight range on the package exactly. Never use a dog tick product on a cat unless it explicitly says it is safe for cats.
Daily habits that make a difference
- Do a quick tick check after hikes, park visits, and time in tall grass.
- Keep your dog on a leash in brushy areas where ticks quest.
- Groom regularly. Ticks are easier to find on brushed coats.
Care and training tips for tick season
A dog who panics during handling is harder to check, and tick checks are a health habit worth training for. The goal is calm cooperation, not wrestling.
Teach “check time”
- Pair touch with treats: Touch an ear, treat. Lift a paw, treat. Look under the collar, treat.
- Go in tiny steps: 30 seconds daily beats a 10-minute struggle once a week.
- Practice restraint gently: Teach your dog to stand on a mat or sit on a towel while you inspect.
- End on a win: Stop before your dog gets annoyed so the next check is easier.
If your dog hates paw handling
Start with just placing your hand near the paw, reward, and remove your hand. Gradually work up to holding the paw for one second, then two. This helps you check between toes where ticks love to hide.
When to call the vet right away
Home removal is fine for many situations, but professional care is the safest route if:
- The tick is attached near the eye, inside the ear, or in another delicate spot
- Your dog has many ticks (possible heavy exposure)
- You cannot remove the tick fully, you are unsure if you removed the entire tick, or the skin becomes increasingly irritated
- Your dog is very young, elderly, pregnant, or immunocompromised
- Your dog shows signs of illness after a bite
Your veterinarian may recommend parasite testing or a screening blood test depending on your region and the timing of exposure.
Quick tick checklist
- Remove the tick with tweezers, pulling straight out with steady pressure.
- Clean the bite site and your tools.
- Take a photo, write down the date, and note where the tick was attached.
- Monitor your dog for several weeks for any signs of illness.
- Start or update an evidence-based tick preventive.
- Build a simple “check time” routine so handling stays calm and easy.
Your dog does not need perfection here. They just need consistency. A few minutes of prevention and checking can protect their comfort, their energy, and their long-term health.