A calm, kid-friendly guide to trimming your dog’s nails at home: nail anatomy, clippers vs. grinders, how to avoid the quick, what to do if it bleeds, and ...
Article
•
Designer Mixes
Cutting Your Dog’s Nails: A Health Guide

Shari Shidate
Designer Mixes contributor
As a veterinary assistant here in Frisco, Texas, I can tell you one thing with confidence: nail care is not just cosmetic. Overgrown nails can change how your dog stands and walks, may put extra strain on joints, and can lead to painful splits or infections. The good news is that with the right tools, a calm plan, and a little practice, most families can learn to trim nails safely at home.

Why nail trimming matters
Healthy nails help your dog move normally. When nails get too long, your dog may shift weight backward or outward to avoid pressure, especially on hard floors. Over time, that can contribute to soreness in the toes, wrists, elbows, shoulders, hips, and back. (Every dog is different, but the biomechanics are a big reason vet teams take nail length seriously.)
- Comfort and mobility: Proper length reduces pressure on the nail bed and helps keep your dog’s gait natural.
- Injury prevention: Long nails can snag on carpet or outdoor surfaces and tear, which is painful and can bleed a lot.
- Paw and toe health: Overgrowth increases the risk of cracked nails and nail bed infections.
- Senior dogs benefit: Older dogs often move less and wear nails down less naturally, so trimming becomes even more important.
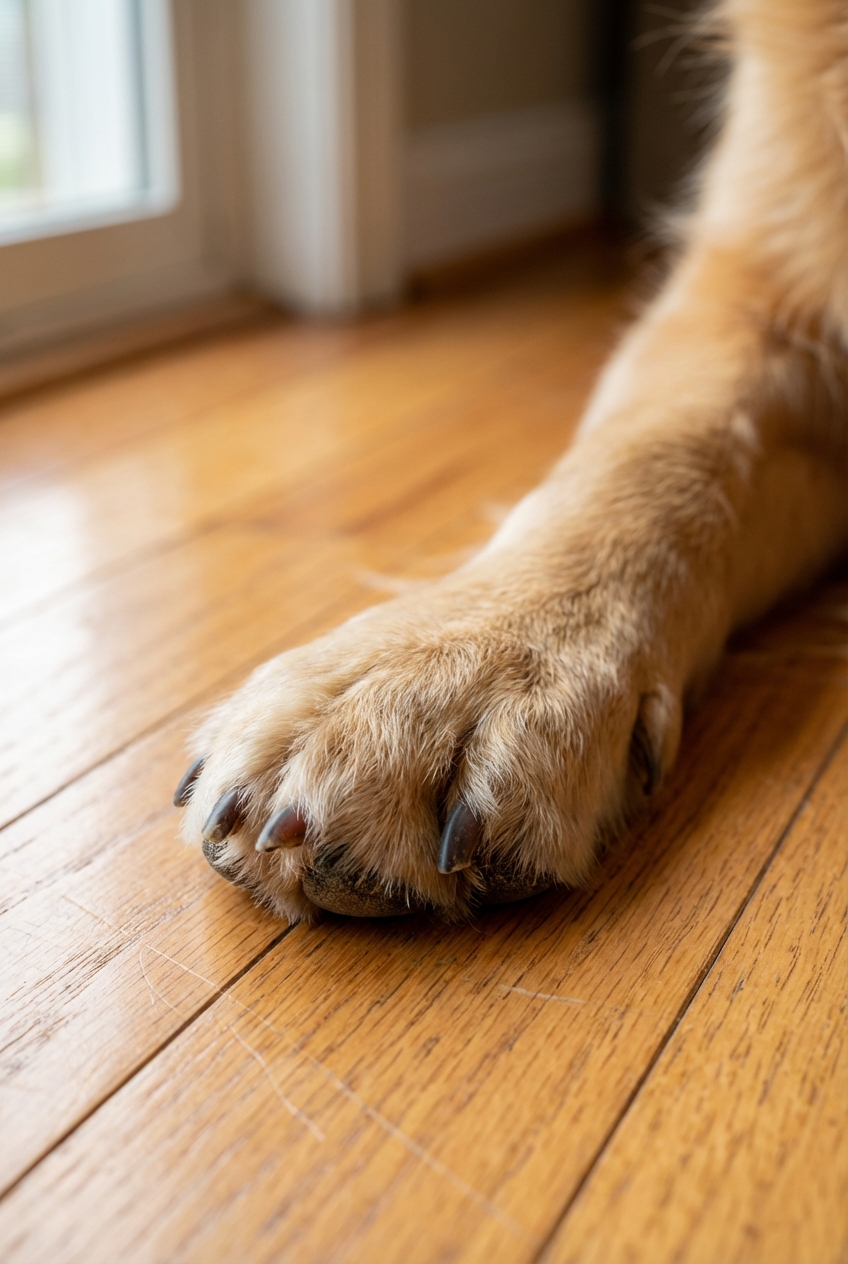
What “too long” looks like
A common myth is that you only need to trim when you hear clicking. Clicking is often a later sign for many dogs, and it can vary by dog and by surface.
- When your dog is standing, nails should not force the toes to lift or splay awkwardly.
- On many dogs, nails should sit just off the ground when standing on a flat surface (dewclaws are the exception, since they do not touch the ground).
- If you notice your dog slipping more on floors, long nails may be part of the problem.
Tools that help
Choose tools that match your comfort level and your dog’s nail type. The right setup reduces the chance of cutting the quick and makes the whole process faster.
Basic toolkit
- Nail clippers: Scissor-style clippers tend to feel steadier for medium and large dogs. Guillotine-style can work well for small dogs if used correctly.
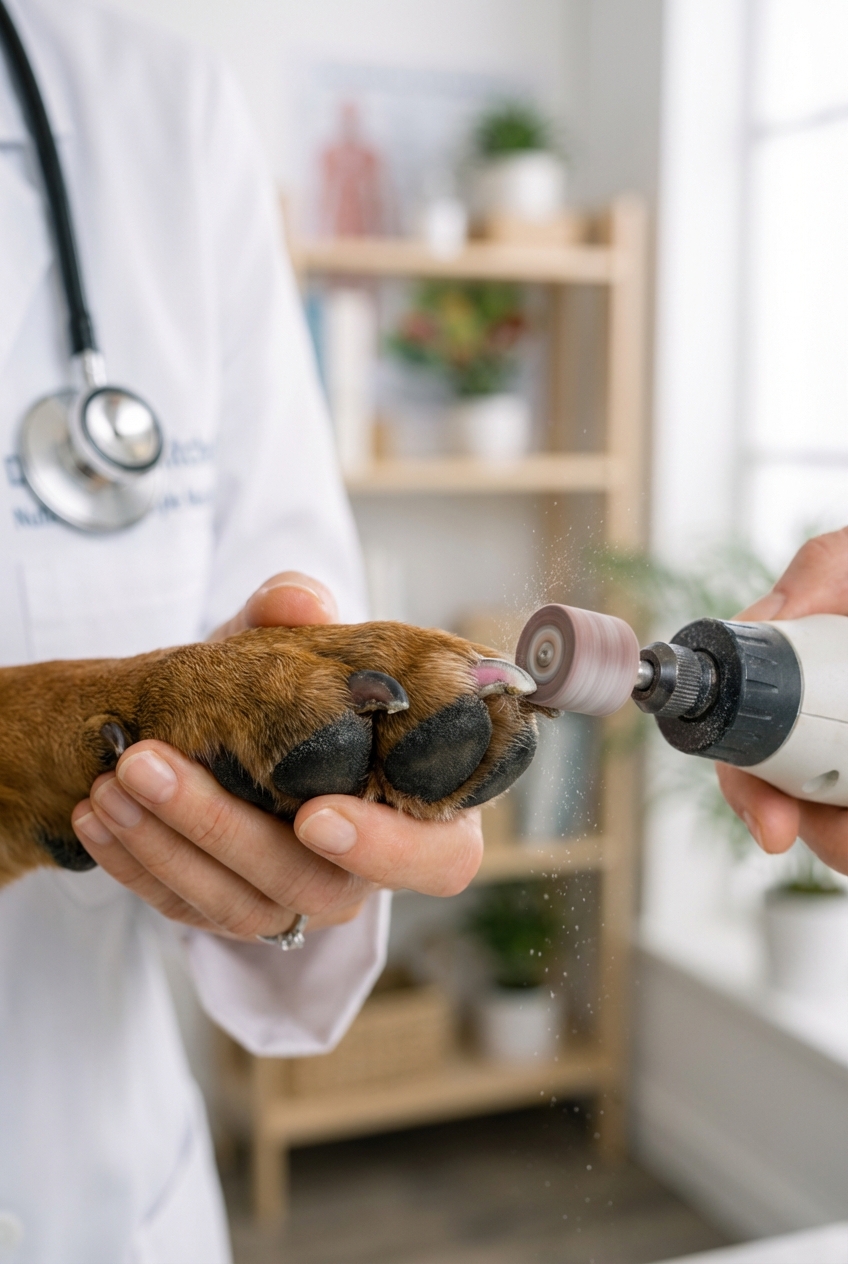
- Nail grinder (rotary tool): Great for rounding edges and taking off small amounts slowly, especially if you are nervous about the quick. Use short pulses and take breaks so the nail does not heat up.
- Nail file: A simple hand file can be a nice option for very noise-sensitive dogs or for smoothing sharp edges.
- Styptic powder or styptic pencil: For emergencies if you nick the quick. Cornstarch can help with minor bleeding in a pinch, but styptic products tend to work better.
- Good lighting: A bright lamp or daylight makes a big difference.
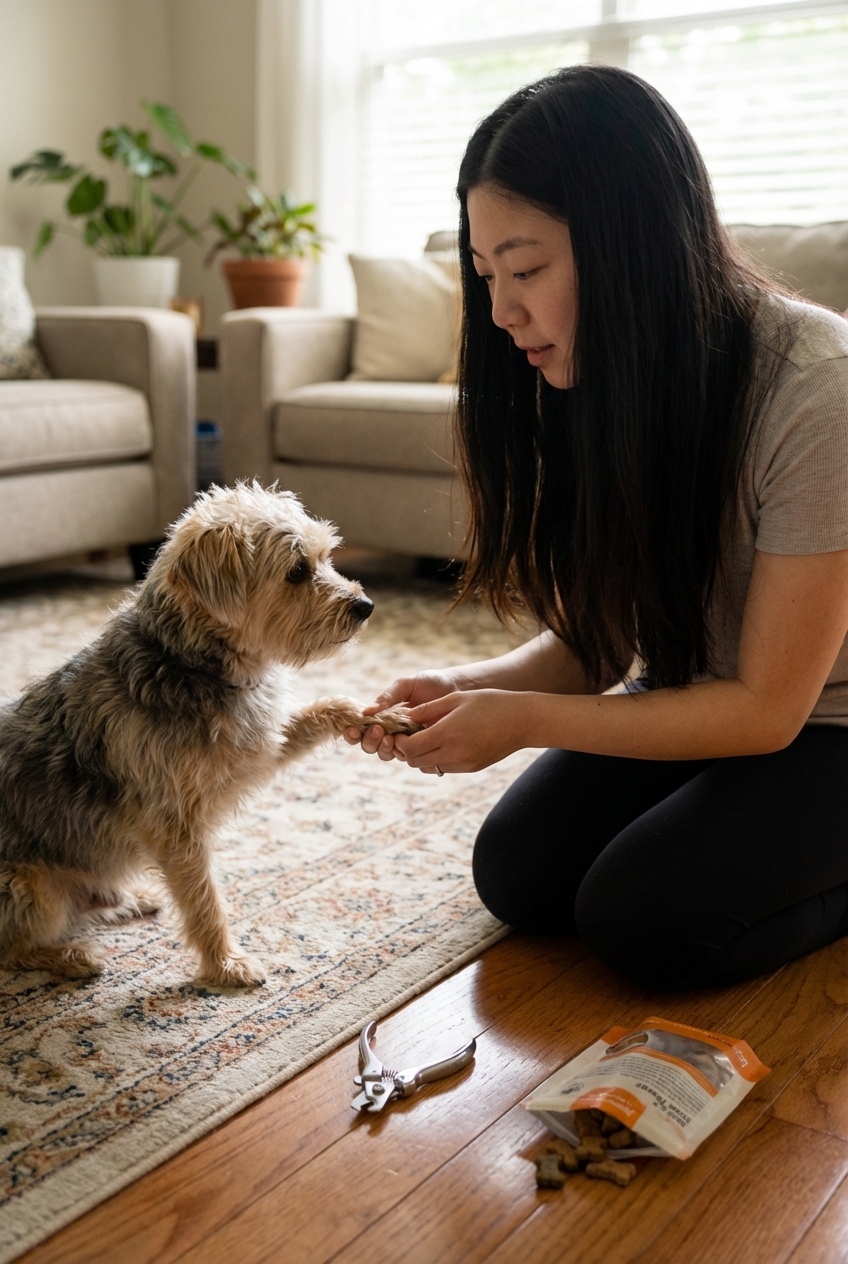
- Treats: Soft, high-value treats help build a positive routine. A lick mat can also keep some dogs calmly busy.
Understanding the quick
The “quick” is the living tissue inside the nail that contains blood vessels and nerves. If you cut into it, it hurts and bleeds. Light nails often let you see a pink center, while dark nails hide the quick and require a slower approach.
Clinic tip: Frequent, tiny trims can encourage the quick to recede over time. This is gradual (think weeks, not days) and depends on how long the nails were to start.
Step-by-step trimming
1) Set your dog up
- Pick a quiet time when your dog is already calmer, like after a walk or meal.
- Use a non-slip surface. A yoga mat or towel helps many dogs feel secure.
- Start with just one or two nails if your dog is anxious. Progress is progress.
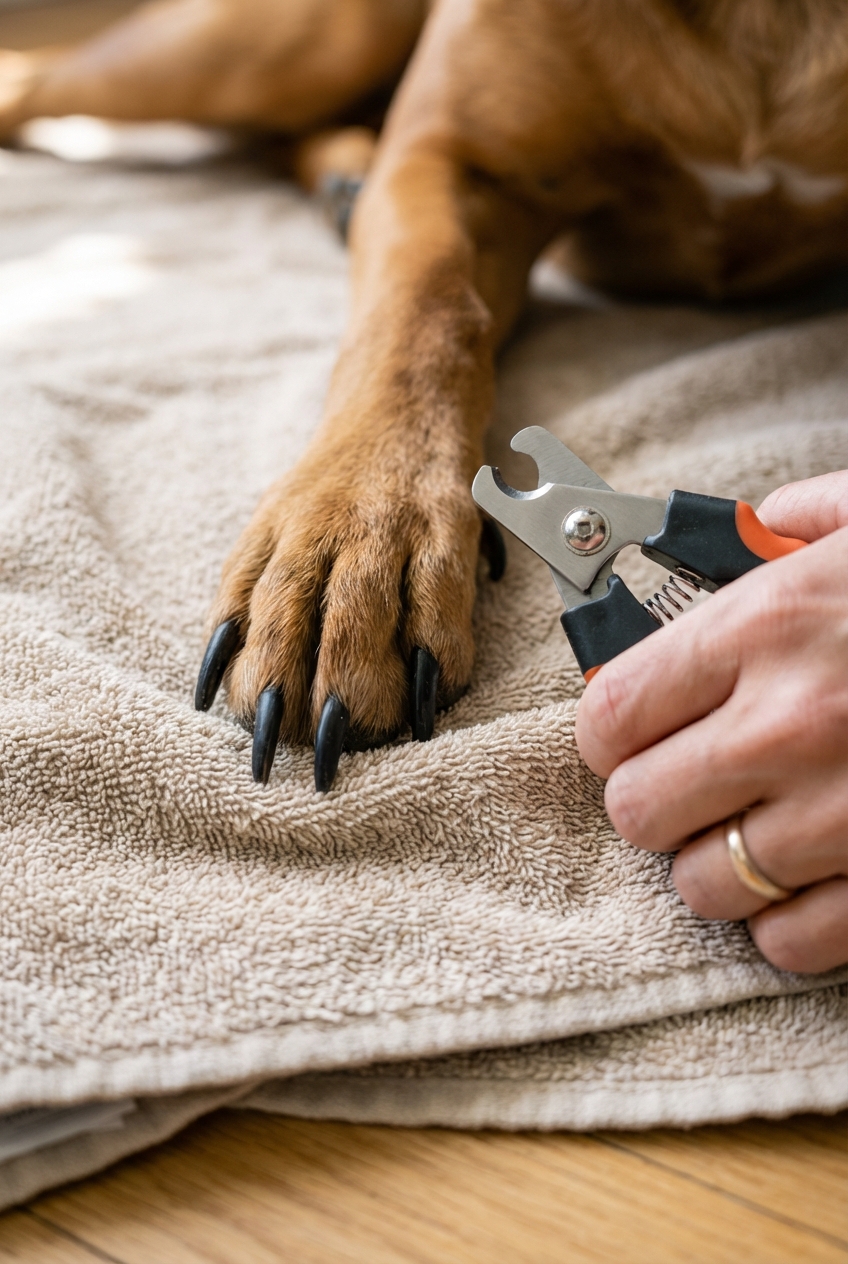
2) Hold the paw comfortably
Support the toe you are trimming and keep the leg in a natural position. I usually work from the side and avoid pulling the leg out or twisting it. A steady, gentle hold prevents sudden movements and reduces the chance of a crooked cut.
3) Trim small amounts
- Beginner rule: Take off a very thin slice at a time (often around 1 to 2 mm, depending on nail size). It is always better to under-trim than to hit the quick.
- Light nails: Trim a thin slice at a time. Stop before you reach the pink quick.
- Dark nails: Take tiny trims and look at the cut surface after each one. When you start to see a small dark dot or oval in the center (it may look moist), you are getting close to the quick, and it is time to stop.
4) Round the edges
If you clip, you can smooth sharp edges with a grinder or file. Rounded nails snag less and feel better on floors and furniture.
5) Reward and stop early
Give a treat after each paw, or even after each nail in the beginning. Then stop before your dog gets overwhelmed. Short, positive sessions build a long-term habit.
If you cut the quick
It happens to experienced people too. What matters is staying calm so your dog does not learn to fear the process.
- Apply styptic powder with gentle pressure for 30 to 60 seconds.
- Keep your dog from licking the area for a few minutes.
- Limit intense activity briefly if the nail is tender.
Call your vet if bleeding does not slow within several minutes, if the nail looks split into the nail bed, or if your dog is limping afterward.
How often to trim
Most dogs do well with trimming every 2 to 4 weeks, but it depends on how fast nails grow and how much they naturally wear down.
- Best maintenance plan: Trim a small amount weekly or every other week.
- If nails are very long: Do tiny trims more often to gradually shorten without hitting the quick.
- Do not forget dewclaws: Not all dogs have them, and some dogs have rear dewclaws too. Because dewclaws do not wear down like other nails, they can overgrow and curl into the skin.
- Start young when you can: With puppies, gentle paw handling and tiny practice trims (even just touching tools) can make a big difference later.
When to choose a pro
There is absolutely no shame in getting help. In fact, choosing safety is responsible pet parenting.
- Your dog has a history of panic, snapping, or severe fear during nail trims.
- Nails are extremely thick, curled, or cracked.
- Your dog has medical issues that make handling painful (arthritis, hip pain, neurologic conditions).
- You notice redness, swelling, odor, discharge, or a broken nail.
If your dog is truly terrified or may bite, talk with your veterinarian before you try again at home. In some cases, a clinic visit, a groomer experienced with fearful dogs, or vet-guided calming medication is the safest option.
Your veterinarian or a qualified groomer can also teach you technique in real time, which can be a game changer.
Helping a fearful dog
Many dogs are not being “difficult.” They are anxious or have had a painful experience. A gentle, evidence-based approach uses desensitization and counterconditioning, meaning we pair nail handling with something your dog loves.
A simple plan
- Touch paw, treat. Release.
- Hold paw for 2 seconds, treat. Release.
- Tap nail with the clipper (no cutting), treat. Release.
- Clip one nail, treat jackpot. Stop.
Keep sessions short, consistent, and calm. If your dog is growling or pulling away hard, you went too fast. Slow down and rebuild trust.
Bottom line
Regular nail trims protect your dog’s comfort, mobility, and paw health. Start slow, trim small amounts, and make it a positive routine. If you get stuck, your vet team is there to help you and your pup feel confident again.