Find a tick on your cat? Follow safe, evidence-based removal steps, what to avoid, how to clean and save the tick, aftercare signs to watch, and when to call...
Article
•
Designer Mixes
Best Way to Remove a Tick From a Cat

Shari Shidate
Designer Mixes contributor
As a veterinary assistant here in Frisco, Texas, I can tell you this with total confidence: tick removal is one of those “small” tasks that can make a huge difference for your cat’s comfort and health. The goal is simple: remove the tick quickly, remove it cleanly, and protect the bite site afterward.
Good news: you do not need fancy equipment. You do need a calm plan, the right tool, and a little patience.
Below is an evidence-based, step-by-step approach that mirrors what many clinics recommend, plus the common mistakes I see that can turn an easy removal into a stressful one.
First, make sure it is really a tick
Ticks can look like tiny dark bumps, especially when they are small or partly hidden in fur. Common lookalikes include scabs, nipples, skin tags, and small bits of debris caught in the coat.
A tick is typically:
- Firm and attached to the skin, not just sitting on top of the fur
- Oval and may look like a small seed
- Slow to move if you nudge it with a fingertip or the tip of a comb
If you are not sure, part the fur and use a bright light. If you see legs near the front and it appears anchored at one point, treat it like a tick.

What you need before you start
Getting supplies first helps you finish the job quickly, which keeps your cat calmer and reduces the chance you leave mouthparts behind.
- Fine-tipped tweezers or a tick-removal tool made for pets
- Disposable gloves (optional but helpful)
- Rubbing alcohol or soap and water for cleanup
- Antiseptic safe for pets (or ask your vet what they prefer)
- A small jar or sealed bag to save the tick
- A towel for a gentle “cat burrito” wrap
- Treats for aftercare and future cooperation
Tip from the clinic: If your cat is wiggly, recruit a helper. One person gently holds and reassures, the other removes the tick.
Also: If you feel squeamish or you are not confident you can do this safely, it is completely okay to have your veterinary team remove it for you.
Step-by-step: tick removal
1) Keep your cat still and comfortable
Choose a quiet room with good lighting. Wrap your cat in a towel with the head exposed if needed. Calm matters because yanking during a sudden wiggle is how ticks tear and leave parts behind.
2) Part the fur and get a clear view
Use your fingers or a comb to separate fur so you can see where the tick is attached. You want to grasp the tick as close to the skin as possible.
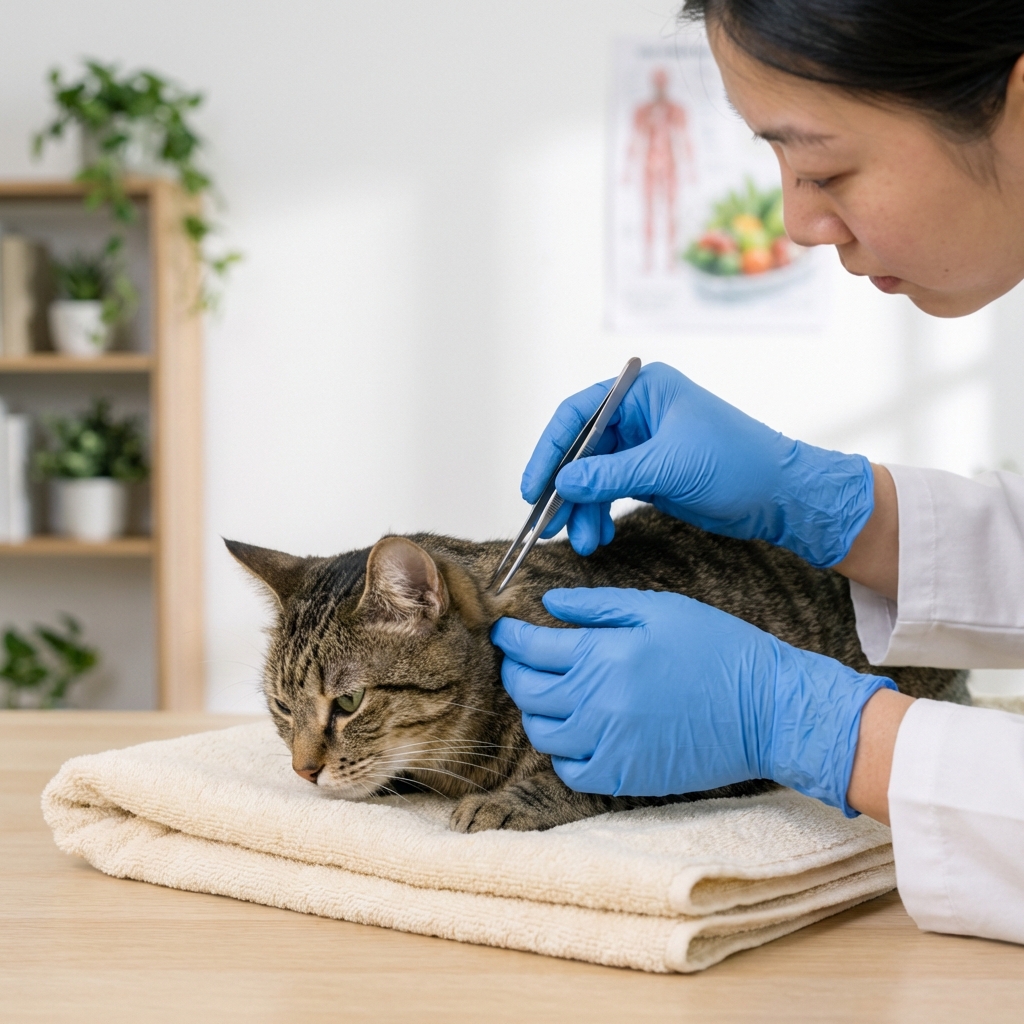
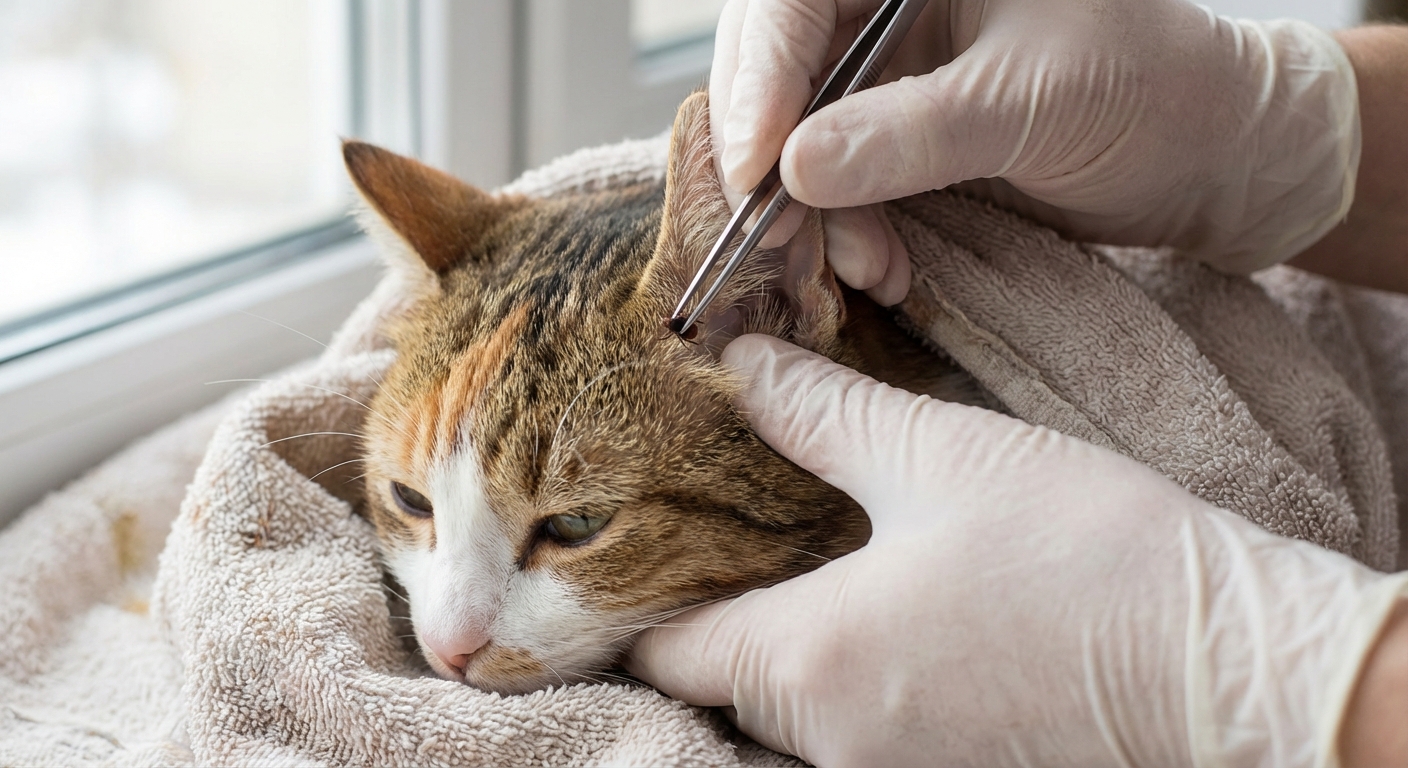
3) Grab the tick close to the skin
With fine-tipped tweezers, grasp the tick right at the base where it meets the skin. Avoid grabbing the swollen body. Squeezing the body can increase local irritation and is best avoided.
4) Remove it with steady pressure
If you are using tweezers: pull straight out in one slow, steady motion. No jerking. Just consistent pressure until it releases.
If you are using a tick-removal tool: follow the manufacturer instructions. Some tools use a lift or lever motion, and some use a gentle rotation as designed. Use the motion the tool is made for, and do not twist with standard tweezers.
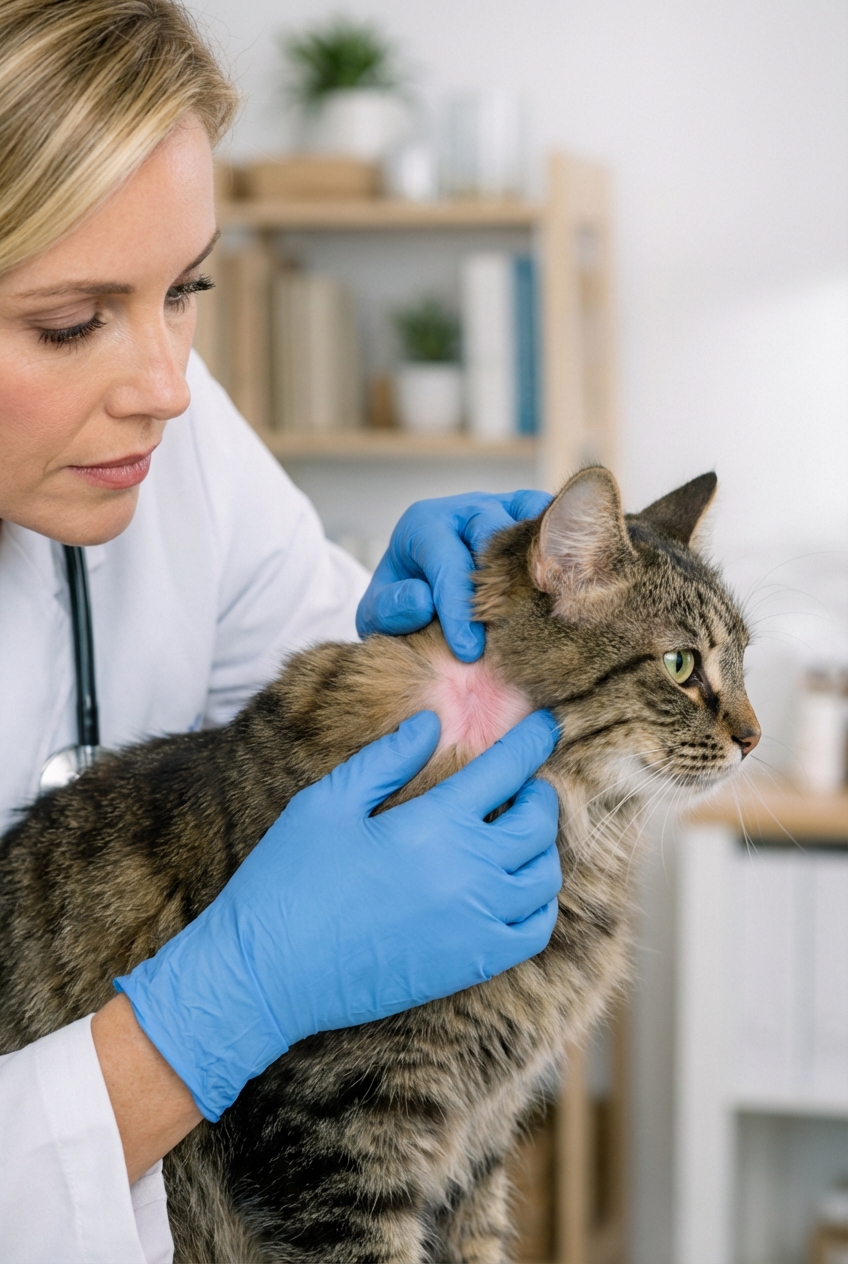
5) Check the tick and the bite site
Look at the tick. If it appears torn or you suspect mouthparts are still in the skin, do not dig aggressively with a needle. That can cause more inflammation. Instead, clean the area and call your veterinarian for guidance.
6) Clean the area and wash your hands
Gently clean the bite site with pet-safe antiseptic or mild soap and water. Wash your hands thoroughly even if you wore gloves.
7) Save the tick (or dispose of it safely)
Place the tick in a sealed jar or bag. Many clinics can still identify a tick that is stored dry in a sealed container. Some clinics prefer it in rubbing alcohol. If you are unsure, keep it sealed and ask your vet what they want.
If you are not saving it, seal it in tape or a bag before throwing it away. Avoid crushing it with your fingers.
What not to do
I know the old home remedies get passed around, but many of them can backfire.
- Do not use petroleum jelly, nail polish, dish soap, or oils to “smother” the tick. This can delay removal and may increase irritation.
- Do not burn the tick off with a match or hot tool. This risks burns to your cat and still does not guarantee a clean removal.
- Do not twist with tweezers. Use a straight, steady pull. Only use rotation if the specific tick-removal tool is designed for that motion.
- Do not squeeze the tick’s body if you can avoid it.
The safest strategy is mechanical removal with proper tools and steady traction.
Aftercare: normal vs not
Normal for the first day or two
- A small red bump or mild irritation at the bite site
- Brief sensitivity if the area is touched
Call your vet if you notice
- Swelling, oozing, or a hot, painful lump at the bite site
- Persistent scab that keeps enlarging
- Lethargy, fever, reduced appetite, or behavior changes
- Limping or stiffness
- Pale gums or weakness (urgent)
- Vomiting or significant diarrhea
Cats can be affected by tick-borne illnesses, and early treatment is always easier than waiting. Keep an eye on your cat for at least the next 2 to 4 weeks, and call sooner if anything seems off.
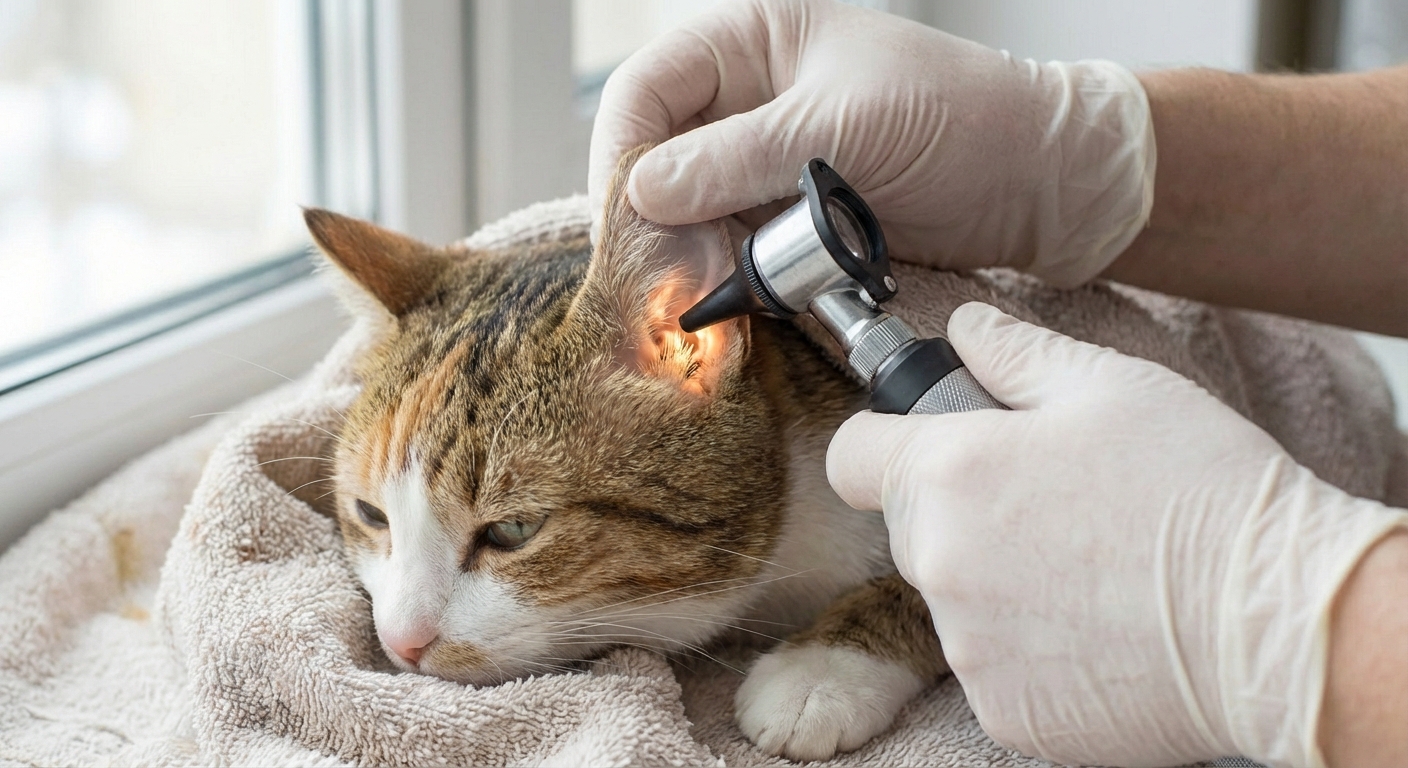
If the tick is in a tricky spot
Some tick locations are simply harder and riskier: around the eyes, inside the ears, between toes, under the collar area, or near the anus or vulva.
Go to your veterinarian if:
- You cannot clearly see the tick’s attachment point
- Your cat is painful, aggressive, or extremely anxious
- The tick is attached near the eye or deep in the ear
- You tried once and the tick tore
- You find multiple ticks, or your cat is a kitten, immunocompromised, or seems ill
How soon should you remove a tick?
As soon as you find it. The longer a tick stays attached, the more irritation it can cause and the higher the risk of disease transmission. Quick removal is one of the best protective steps you can take at home.
Prevention: make removal rare
If you are removing one tick, it is smart to assume there could be more. Do a full-body check, especially:
- Head and neck
- Under the collar
- Armpits and groin
- Between toes
- Base of tail
Then talk with your veterinarian about a cat-safe tick preventive. This matters because some dog tick products are dangerous for cats. Stick with products specifically labeled for cats and recommended by your clinic.
Important reminder: Avoid using or applying permethrin-containing products on cats (and be careful with close-contact dogs treated with permethrin until the product is fully dry), since permethrin can be toxic to cats.
Practical routine that helps: quick coat checks after outdoor time, keeping grass trimmed, and using consistent veterinary-recommended prevention during tick season.
Quick checklist
- Use fine-tipped tweezers or a tick-removal tool
- Grab close to the skin
- Tweezers: pull straight out, slow and steady
- Tool: follow the manufacturer motion
- Clean the bite site
- Save the tick in a sealed container (dry or per your vet’s preference)
- Watch for redness, swelling, or illness for at least 2 to 4 weeks
- Start or update cat-safe tick prevention
If you want, tell me where you found the tick and whether your cat goes outdoors. I can help you think through the safest next step and what to watch for.